All posts by David H. Lawrence XVII
Gifting Rehearsal® Pro
We know how tough it can be to come up with just the right gift for another actor – a play, a book, a workshop…fortunately, we have the perfect solution: gift those actors you know and love and want to support a copy of Rehearsal® Pro. Share the joy you’ve had with your copy, and make your fellow actors smile!
All you need is their email address.
(Before you gift it to any actor, make sure they use an Apple device – Rehearsal® Pro isn’t available for Android users.)
Gifting Rehearsal® Pro
1. For this to work, you’ll need to read this help page only on your device – you can’t gift apps on computers, only iOS devices.
Start by tapping on the link below to take you to Rehearsal® Pro’s page in the App Store app:
https://rehearsal.pro/download
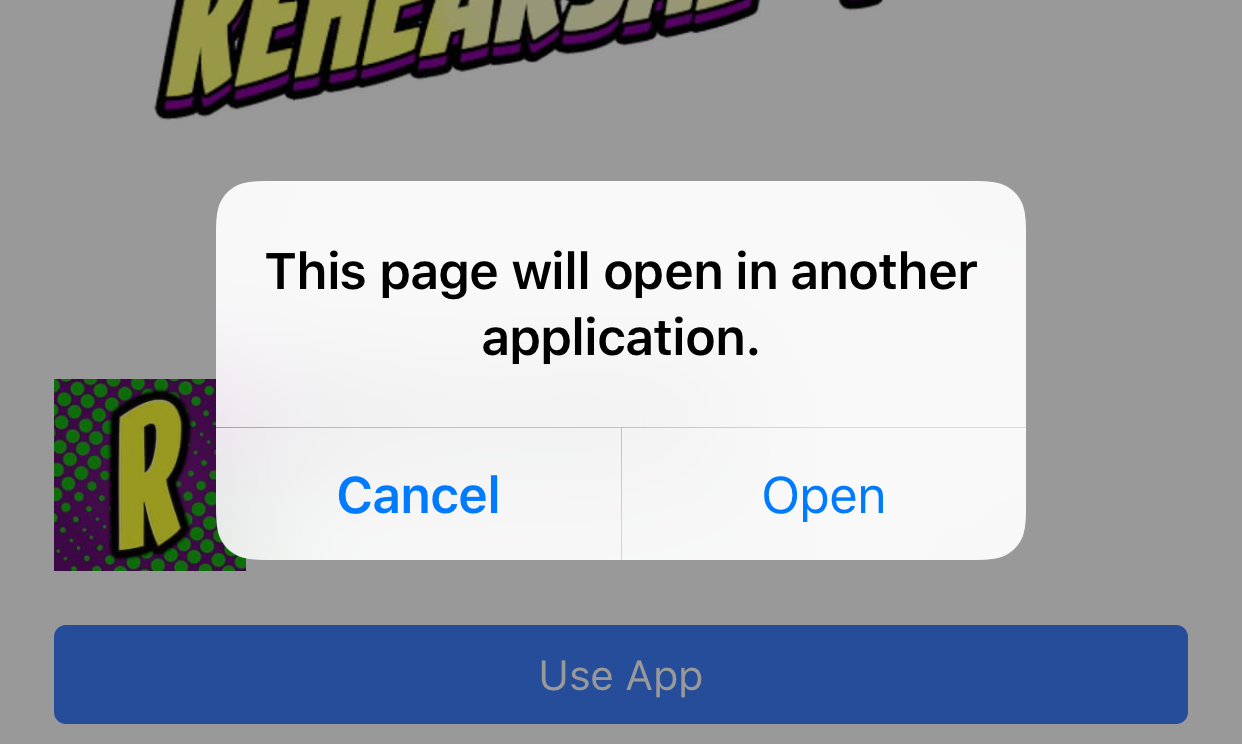
When you get this message, tap on Open:
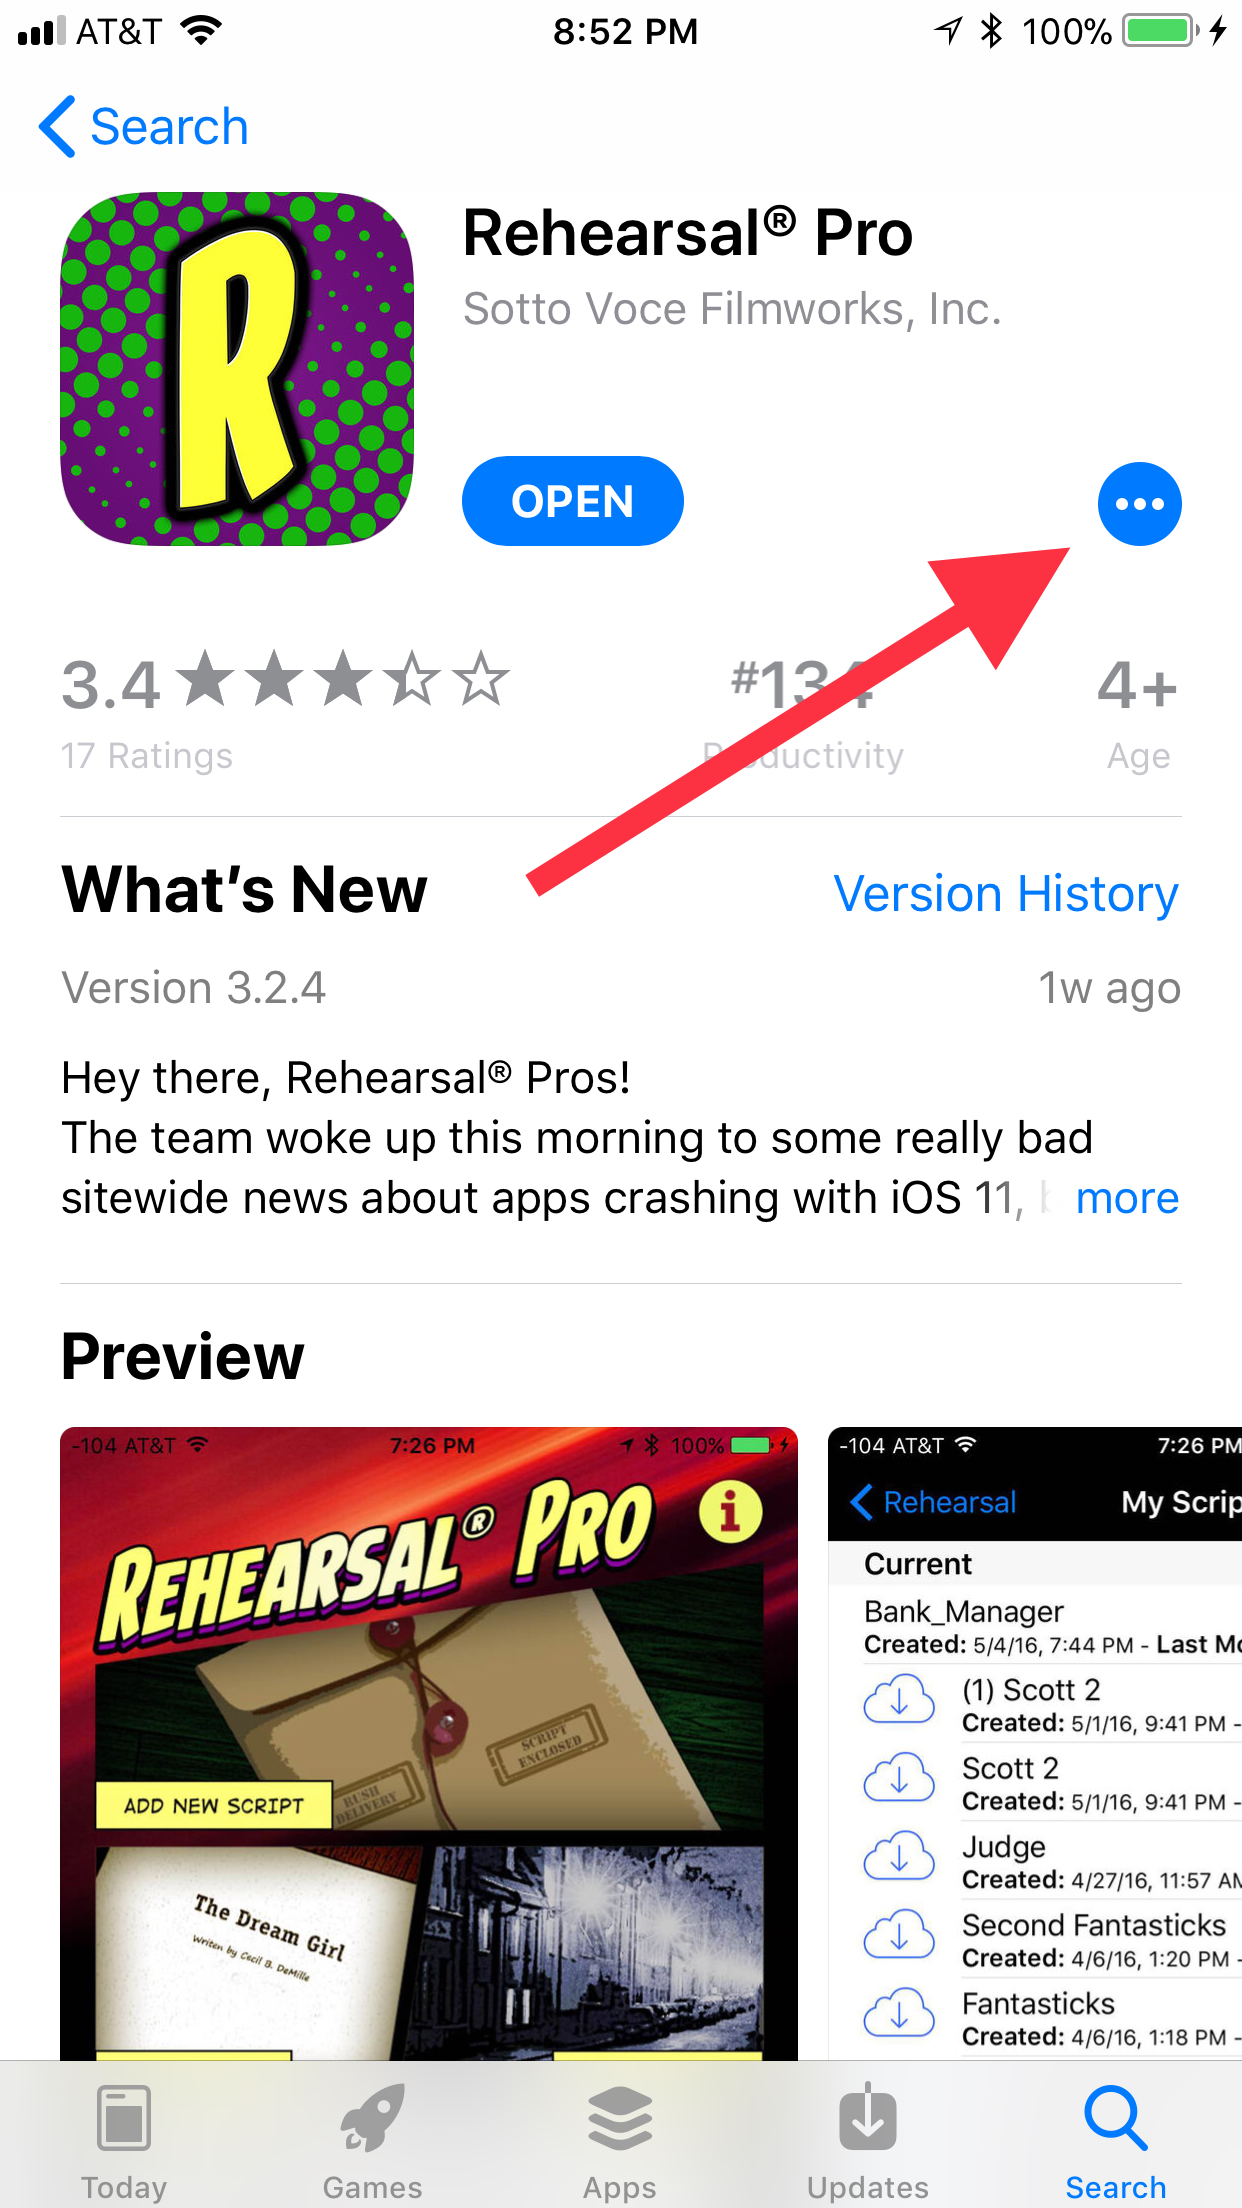
You should see the Rehearsal® Pro app page. Tap on the three-dot menu in the title block:
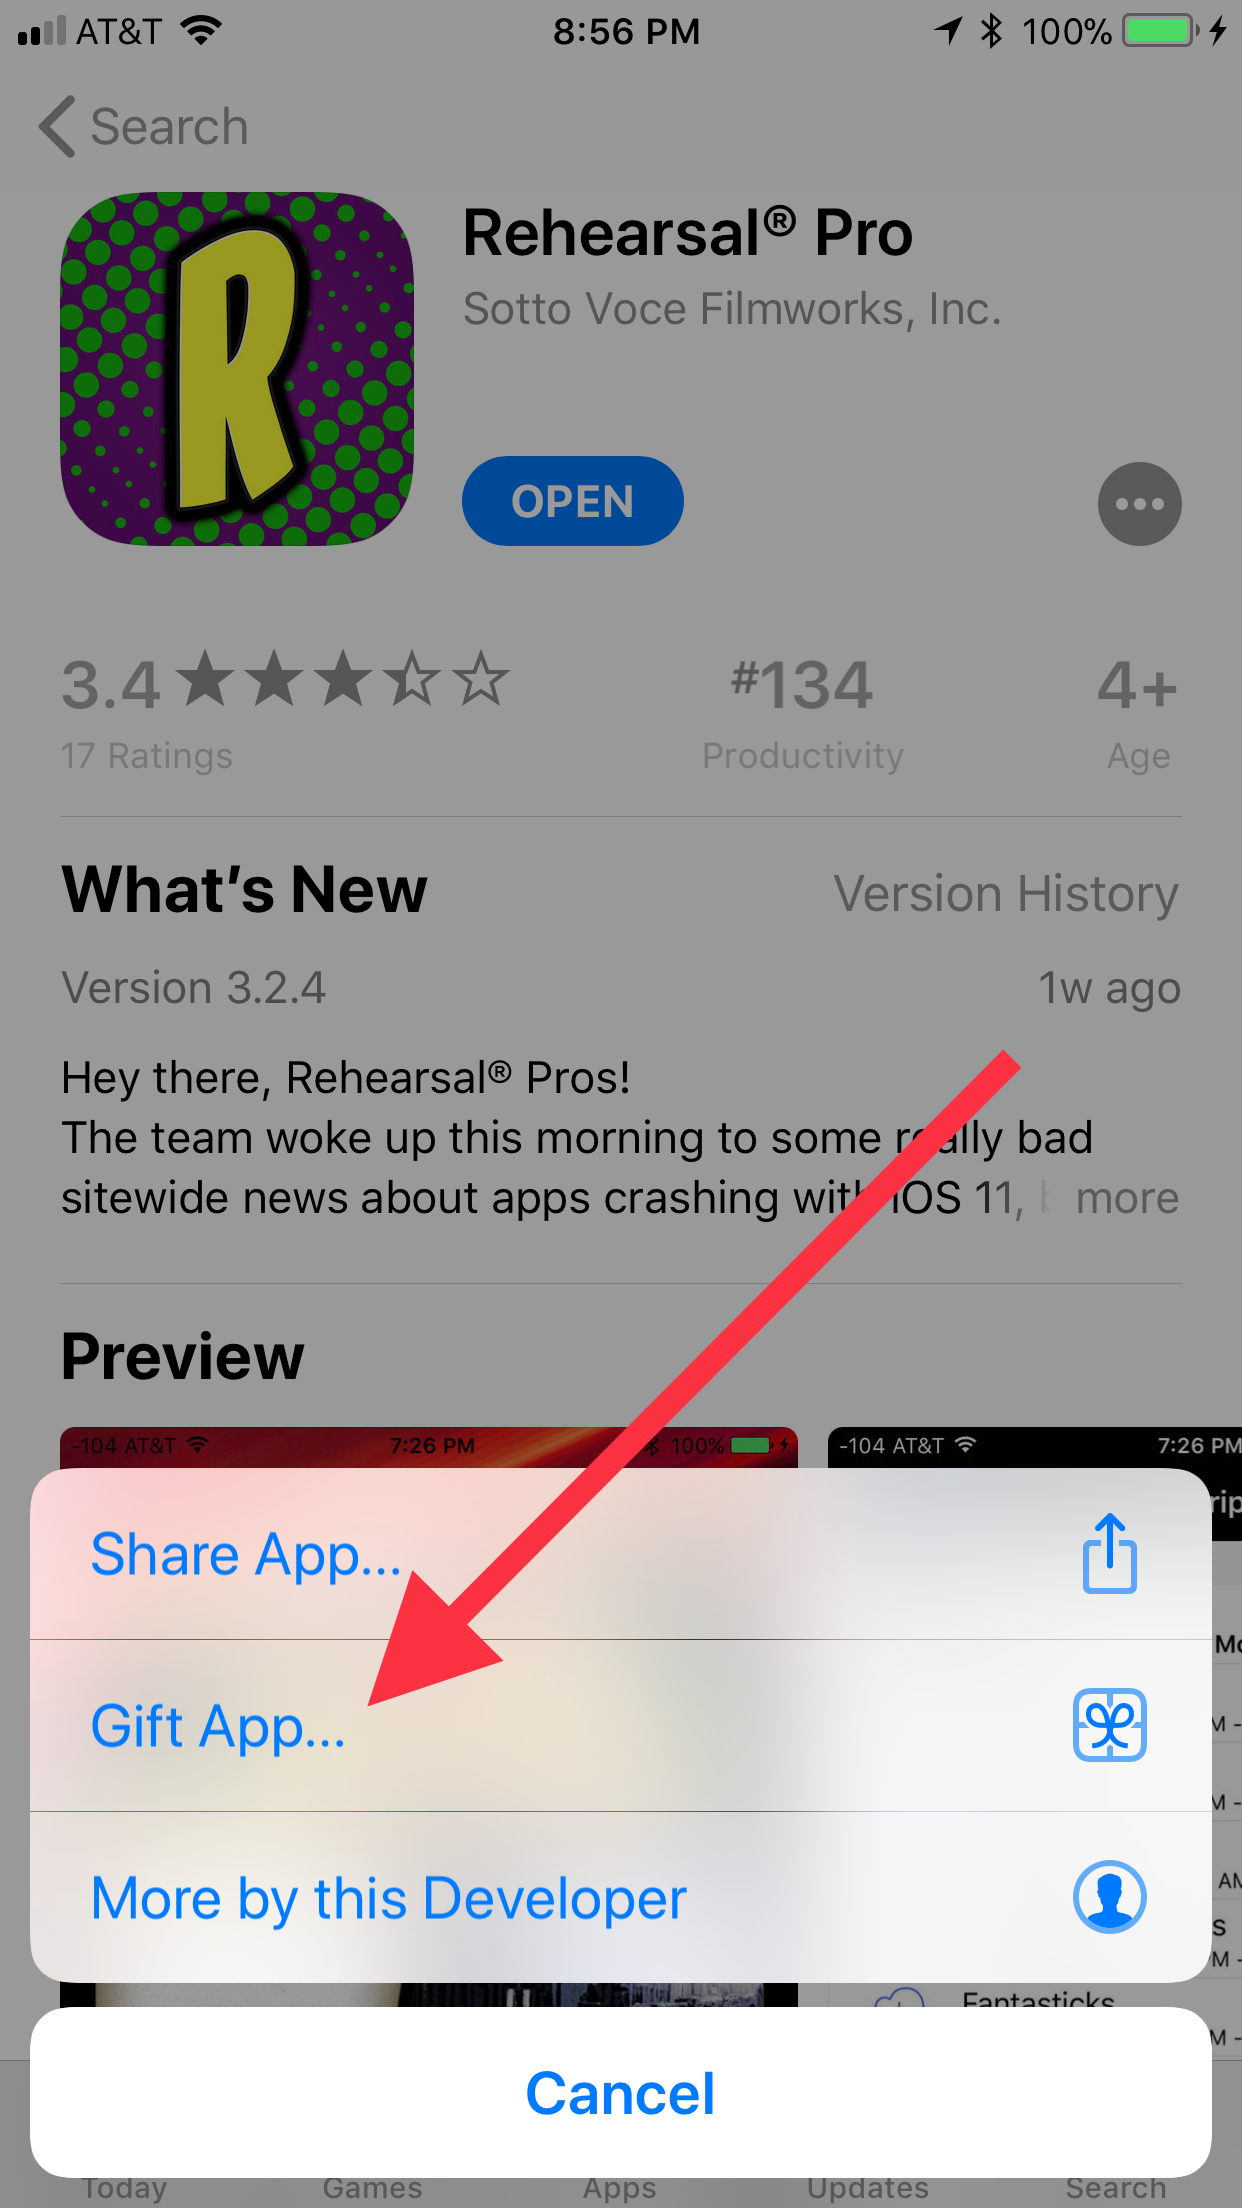
2. On the menu that appears, tap on the Gift app… button:
3. On the screen that then appears, enter the email address of the user you want to gift to, and a message of up to 200 characters. You can leave the date the gift will be sent as today, or you can change it to another day:
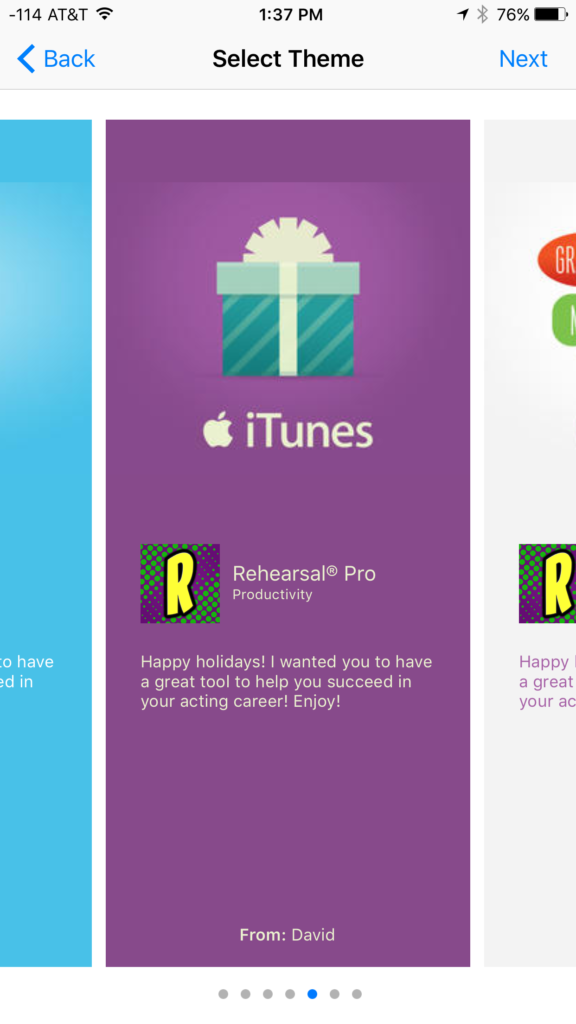
5. Tap Next (in the upper right corner), and select a theme for your notification email on the following screen (Apple changes the designs all the time, so your screen may look slightly different):
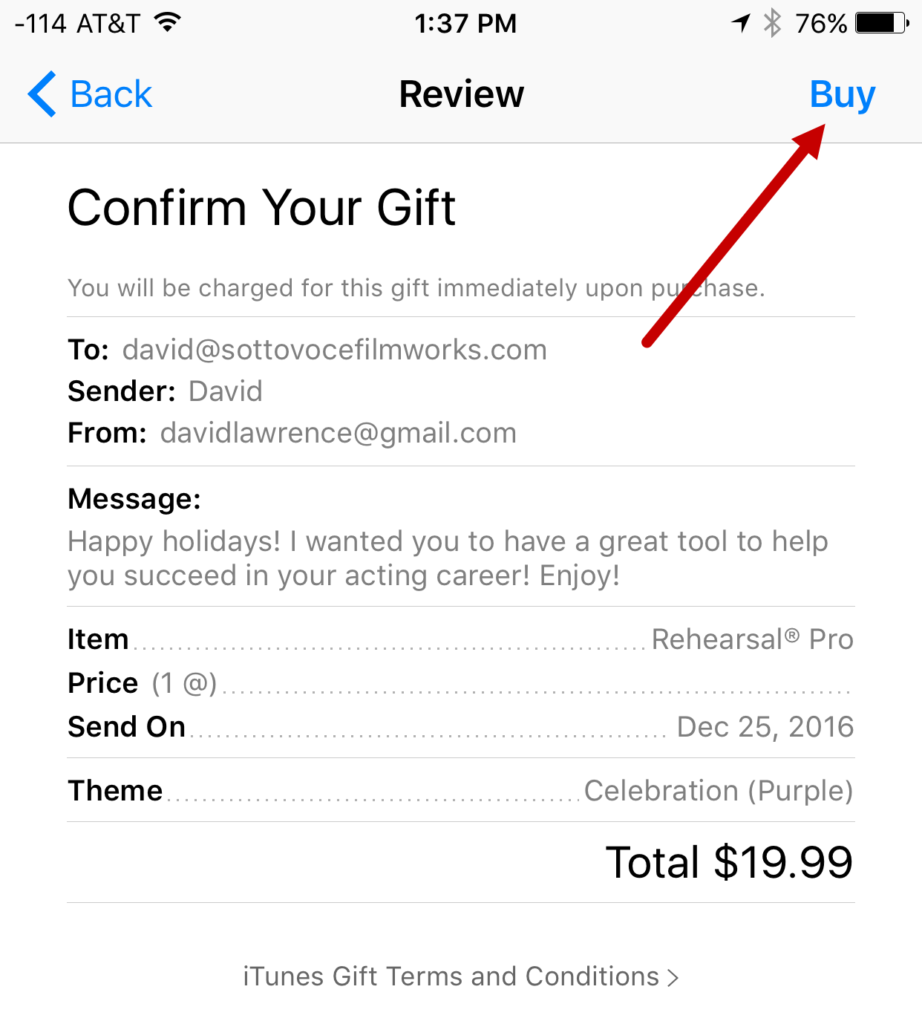
6. Tap Next (in the upper right corner) to review your purchase on the following screen, then tap Buy, then tap BUY NOW (both in the upper right corner) to complete the transaction (you may have to sign in to iTunes again):
And you’re finished! And thank you for helping another actor make a lovely difference in their career by being off-book with Rehearsal® Pro.
Searching In A Script
In a script that is a text-based PDF, you might want to locate a particular passage or the lines for your characters.
Rehearsal® Pro allows you to search for text throughout your script, allowing fast and easy access to any passage in which that text appears.
Here’s a video that shows you how to use the Search function, with a step-by-step below that:
Step by step
To use Search:
- Open any script from My Scripts.
- Tap on the Menu in the upper right hand corner of your screen.
- Tap on Search.
- Tap in the Search bar that appears at the top of your script and tap in your search term.
- Tap Search.
- If Search finds one or more examples of your search term, it will scroll to the first one in the script, and tell you in the search bar how many more there are. You can tap the up and down arrows to the left of the search term entry box to move between them.
- When you’re finished, tap Done to the right of the search term entry box.
Remember, Search is only able to be used on PDFs that are text-based, not graphics-based (like those you might get from casting offices, who usually mark up printouts with a Sharpie with audition notes and directions, and then scan the sides back in before sending them to you).
Bookmarks
In longer scripts, it can be a chore to scroll through page after page to get to where you want to go, especially if you’re working with the same few pages throughout the script.
Rehearsal® Pro allows you to set and delete bookmarks throughout your script, allowing fast and easy access to any page on which you’ve placed a bookmark.
Here’s a video that shows you how to place, use and delete bookmarks, with a step-by-step below that:
Step by step
To place a bookmark:
- Scroll to the point in the script where you want to place the bookmark.
- Tap on the Menu in the upper right hand corner of your screen.
- Tap on Bookmarks.
- Tap in the Name New Bookmark space and give your bookmark a name.
- Tap Done.
To use a bookmark:
- Tap on the Menu in the upper right hand corner of your screen.
- Tap on Bookmarks.
- Tap on the bookmark you want to head to.
Bookmarks will always be listed in order of their location in the script.
To delete a bookmark:
- Tap on the Menu in the upper right hand corner of your screen.
- Tap on Bookmarks.
- Tap on the blue circled X to the right of the bookmark you want to delete.
- Tap Done.
What Those Script/Scene Icons Mean
Next to each script in My Scripts, or scene in My Scenes, you’ll find an icon.
Or not.
These icons give you an indication of what state the script or scene is in. If you’re working with more than one device, the icons will let you know if you have markup that needs to be synced or is ready to be downloaded. And if you’re sharing your script with another Actor or Reader, the icon will also tell you that status.
If there’s no icon, it means the script or scene is up to date, synced to the cloud, on your device and ready to be worked with. Good for you!
If there is an icon, here’s a guide to what those icons mean:
 If there’s a blue outlined cloud icon with a downward arrow inside next to a scene or script, that means the item is not on your device, it is in the cloud, you need to download it to your device to use it (you do so by tapping on the icon itself), and it’s not shared by you to a Reader, or to you from an Actor.
 If there’s a black outlined cloud icon with a downward arrow inside next to a scene or script, that means the item is on your device, but it has updates waiting for you in the cloud, you need to download those updates to your device to have the latest version of the item (you do so by tapping on the icon itself), and it’s not shared by you to a Reader, or to you from an Actor.
 If there’s a large blue outlined arrow, pointing to the left, with no cloud next to a scene or script, that means the item is on your device, it has no updates waiting for you in the cloud, and it’s been shared by you to a Reader.
 If there’s a blue outlined cloud icon with a downward arrow inside, and a small arrow pointing to the left on the bottom of the cloud next to a scene or script, that means the item is not on your device, it is in the cloud, you need to download it to your device to use it (you do so by tapping on the icon itself), and it’s also been shared by you to a Reader.
 If there’s a black outlined cloud icon with a downward arrow inside, and a small arrow pointing to the left on the bottom of the cloud next to a scene or script, that means the item is on your device, but it has updates to the markup in the cloud, you need to download those updates to your device to use the latest version (you do so by tapping on the icon itself), and it’s also been shared by you to a Reader.
 If there’s a large blue outlined arrow, pointing to the right, with no cloud next to a scene or script, that means the item is on your device, it has no updates waiting for you in the cloud, and it’s been shared by you from an Actor.
 If there’s a blue outlined cloud icon with a downward arrow inside, and a small arrow pointing to the right on the bottom of the cloud next to a scene or script, that means the item is not on your device, it is in the cloud, you need to download it to your device to use it (you do so by tapping on the icon itself), and it’s also been shared to you to an Actor.
 If there’s a black outlined cloud icon with a downward arrow inside, and a small arrow pointing to the right on the bottom of the cloud next to a scene or script, that means the item is on your device, but it has updates to the markup in the cloud, you need to download those updates to your device to use the latest version (you do so by tapping on the icon itself), and it’s also been shared to you to an Actor.
 If there’s a solid blue cloud icon with a progress spinner next to a scene or script, that means the item is not on your device, it is in the cloud, and that it is in the process of being downloaded.
 If there’s a solid black cloud icon with a progress spinner next to a scene or script, that means the item is on your device, but that there are markup updates in the cloud, and that those markup updates are in the process of being downloaded.
 If there’s a yellow arrow icon pointing upward next to a scene or script, that means the item has markup that has been added, that markup has yet to upload to the cloud, and that those markup updates are in the process of being gathered. Once the markup is gathered, the arrow will turn green, and it will be uploaded.
 If there’s a green arrow icon pointing upward next to a scene or script, that means the item has markup that has been added, that markup has been gathered, and that those markup updates are in the process of being uploaded. Once the upload finishes, the arrow disappears.
Syncing Markup And Scenes
Syncing is automatic in Rehearsal® Pro
If you work on your scripts on more than one device, adding highlighting and comments on your iPad, recording scenes and scribbling notes on your iPhone and so on, Rehearsal® Pro automatically syncs all that work between your devices, updating those changes via the cloud (a fancy name for the secure, protected server computer where your data is kept safe) so you always have the latest work available to you wherever you are, and with whatever device you have with you.
Syncing via the cloud means your work is also stored in the cloud, backed up and ready to be downloaded should you install or re-install the app on any device.

All you have to do is be logged in with the same Rehearsal® Pro user account. In other words, don’t create a separate account for each device – just log in to both devices with the same username and password.
NOTE: Syncing will COMPLETELY REPLACE any older script versions, and any scenes affected by those changes, on other devices. In other words, once you make a change on a script you’re working on, those changes will be synced to other devices, and whatever versions you had before will be gone. Syncing updates any markup (highlighting, scribbling, comments, beat marks, Linesets and scenes) you’ve created on those devices.
Also, when you first register Rehearsal® Pro, all of your old scripts will be available to you in the Already Added Scripts section of your Add New Scripts area, but they will be the original scripts, with no markup. Only markup that you’ve created in Rehearsal® Pro will be synced.
How syncing works
You probably won’t even notice the app doing its syncing job, but you can see it happen if you look closely. Syncing itself happens automatically, in two separate steps:
1. Once you make a change to a script, Rehearsal® Pro will display a yellow up-arrow in various locations on your screen (usually next to the MENU icon in the upper right hand corner, but also next to Lines in Linesets) to indicate that it’s preparing to send those changes to the cloud, to be available for other devices to grab:
![]()
2. Once the app has gathered all the changes you’ve made, the arrow will turn to green, indicating that Rehearsal® Pro is uploading those changes to the cloud.
![]()
Getting the updated version of your scripts
There are a couple of ways to get the newly updated scripts and markup onto your other devices.
1. If you have the same script open on both devices at once, you’ll see the synced updates on your other device appear automatically. As an example, if you add highlighting to a script open in Rehearsal® Pro on your iPhone, and you have the same script open in Rehearsal® Pro on your iPad, moments after you add that highlighting to the script on your iPhone, you’ll see that new highlighting on your iPad.
2. With scripts, you need to go to My Scripts to download the newly updated versions. You’ll notice a black or blue cloud next to each script that is not yet on that device. If it’s black, it means there are no recent changes to the script, but that you need to download the scene so you can use it on your device. If the cloud is blue, that means there are changes waiting for you that have been uploaded from your other device.
Just tap the cloud in either case to download the updated script, then tap on the script to open it and start working with it.
In the example below, the upper script in the list, THE BOYS, is waiting to be downloaded, and the lower one, MR. MILLER SIDES, is already downloaded to the device, ready to tap on and work with:

3. With scenes, you need to go to My Scenes to download the newly updated versions. You’ll notice a black or blue cloud next to each scene that is not yet on that device. If it’s black, it means there are no recent changes to the scene, but that you need to download the scene so you can use it on your device. If the cloud is blue, that means there are changes waiting for you that have been uploaded from your other device.
Just tap the cloud in either case to download the scene, then tap on the scene to open it and start rehearsing with it.
Be careful not to make simultaneous changes
One thing you want to avoid doing is adding markup to the same script or scene, on more than one device, at the exact same time.
Rehearsal® Pro’s syncing feature will automatically upload any changes you make on any device. So, if you have the same script open on both your iPhone and your iPad, as an example, don’t move back and forth at the same time making changes, as any change you make on one device might negate the changes you make on the other.
This is only a concern when working on both devices with the same script or scene at the exact same time.
Feel free to make updates on your iPhone, but allow the app to sync those changes, then download the new version on your iPad. You can then make updates of your scripts and scenes on your iPad, let that sync, then download the new version back to your iPhone. This is particularly useful when, say, you’re traveling to set, the audition space, the theater and so on, and you work with your iPad at home, and your iPhone when traveling. You can make changes at home on your iPad, then download the synced updates to your iPhone. Conversely, you can then make changes on your iPhone on set or on stage or wherever you go, let those sync, and find them waiting to be downloaded on your iPad when you get home.
You need to be connected to the Internet for any of this to take place, and the app will wait for you to get connected if you’re not. If you happen to be working with your scripts and scene on, say, the subway, an airplane or anywhere you don’t have a connection, you’ll need to wait until you get online via WiFi or cellular for any markup you made while without connectivity to sync.
Adding/Reinstalling/Updating Rehearsal® Pro
One of the advantages of syncing is that should you need to delete and re-install your copy of Rehearsal® Pro, or add it to a new device, like a new model iPhone or a newly acquired iPad, all your scripts AND your markup and scenes will be waiting for you on that new device to download and use. Again, be sure to log in with the same username and password on all your devices.
And not to worry: when we update the app and release a new version in the App Store, and you update to that new version, nothing will change about your scripts and scenes. They’ll all be there, waiting for you to work with them. Just tap the cloud next to each one you want to use.
Recording and Submitting a VO Audition
The built-in microphone on your iPhone or iPad is really, really high-quality…good enough to do VO auditions with.
And because I often found that I and other actors I knew were sometimes asked to audition for VO when not at home or near our agents’ office and didn’t have access to our recording equipment, I decided to add that option to Rehearsal® Pro. RP will allow you to import your VO audition script, record it, and convert it to an MP3 file – and then mail it to whoever you like: your agent, a casting director, or to yourself.
The process is exactly like recording and naming scene audio for on-camera work. If you know how to do that already, just skip down to step 9 in the process below.
Here’s a step by step how-to on recording and submitting a quick VO audition:
- Forward your attached PDF VO audition script, just as you would an on-camera script, to your script+USERNAME Rehearsal® Pro email address.
- Open Add new script and add the VO audition script to your library.
- When the script is added, tap Save on the Script Info screen to skip (unless you want to add info).
- Tap on Rehearsal to skip the Prep Script step (you don’t need that).
- If you’d like to mark up your script with highlights, feel free to do so. Review your script and make your choices.
- Once you’ve reviewed your script and are ready to record your audition, hold your phone about 6 inches from your face, tap the red recording icon on the left end of the bottom toolbar, and record your audition, scrolling as you need to to move through the script.
- When finished, tap the gray square-in-circle Stop button, just like you would if you were recording an on-camera scene.
- Enter a name for your audition in the Name the Scene screen that follow, then tap Save.
- Now, tap the “hamburger” menu in the upper right hand corner, and choose Email scene audio as MP3.
- If you want, edit the default name Rehearsal® Pro provides for your audition. When you’ve finished, tap Done on the keyboard.
- In the TO box of the next screen, enter the email address for the person you want to receive the MP3 file. Then tap Send. Rehearsal® Pro will then convert your audition to an MP3, and will email it to the addressee you selected.
And that’s it!
One thing to note is that this option is only meant for short clips, like 30 – 60 second commercials and similar quick items. If you try to use this to email scene audio, the email attachment size limits will likely prevent you from doing so.
Renaming Scenes
Rehearsal® Pro will name scenes for you as you record them, incrementing the Take number. And that can be all you need.
But sometimes, it’s useful to rename scenes to something that’s easier to identify in the list of scenes associated with a script in My Scenes.
Here’s a video that shows you how rename a scene, with a step-by-step explanation below the video:
To rename a scene:
- Open My Scenes
- Tap on the triangle next to the name of the script whose scene or scenes you want to delete.
- Tap on the Edit button on the navbar, in the upper right hand corner of the screen.
- Double-tap on the name of the scene you want to rename.
- When the name editing screen appears, delete the old name and enter the new name for the scene.
- Tap Done on the name editing screen.
- Repeat for any other names you want to change.
- When finished, tap on the Done button on the navbar, in the upper right hand corner of the screen.
You can do the same thing when renaming scripts in My Scripts.
Deleting Scenes
Deleting scenes when you’re finished rehearsing with scenes, deleting them to free up space on your device is easy.
Here’s a video that shows you how, with a step-by-step explanation below the video:
To delete a scene:
- Open My Scenes
- Tap on the triangle next to the name of the script whose scene or scenes you want to delete.
- Tap on the Edit button on the navbar, in the upper right hand corner of the screen.
- Tap on the red circle with a hyphen in it, to the left of the scene you want to delete.
- Tap on the red Delete confirmation button that appears, to the right of the scene you want to delete.
- Repeat this process for any other scene you want to delete.
- When finished, tap on the Done button on the navbar, in the upper right hand corner of the screen.
You can do the same thing with scripts in My Scripts.
Using Car Play Mode When Driving
When driving to rehearsals, performances and auditions, you want to put safety first. The standard timeline controls on Rehearsal® Pro are designed to show as much of your script as possible, and are easily accessible when standing or sitting on stage or in a rehearsal space.
You don’t ever want to try to manipulate these standard controls when driving. Use Car Play mode instead. And engage Car Play mode when you’re stationary, like before you start to move the vehicle.
To use Car Play mode, open any scene that you’ve recorded. You’ll see an icon next to the main menu in the upper right hand corner. (If you don’t see one, then you’re not in a Scene, you’re in a Script. Go to My Scenes and choose a recorded Scene from that script, or record a new scene from the script.)
![]()
Once in Car Play mode, you’ll see a bright blue field with large controls almost completely covering the script:
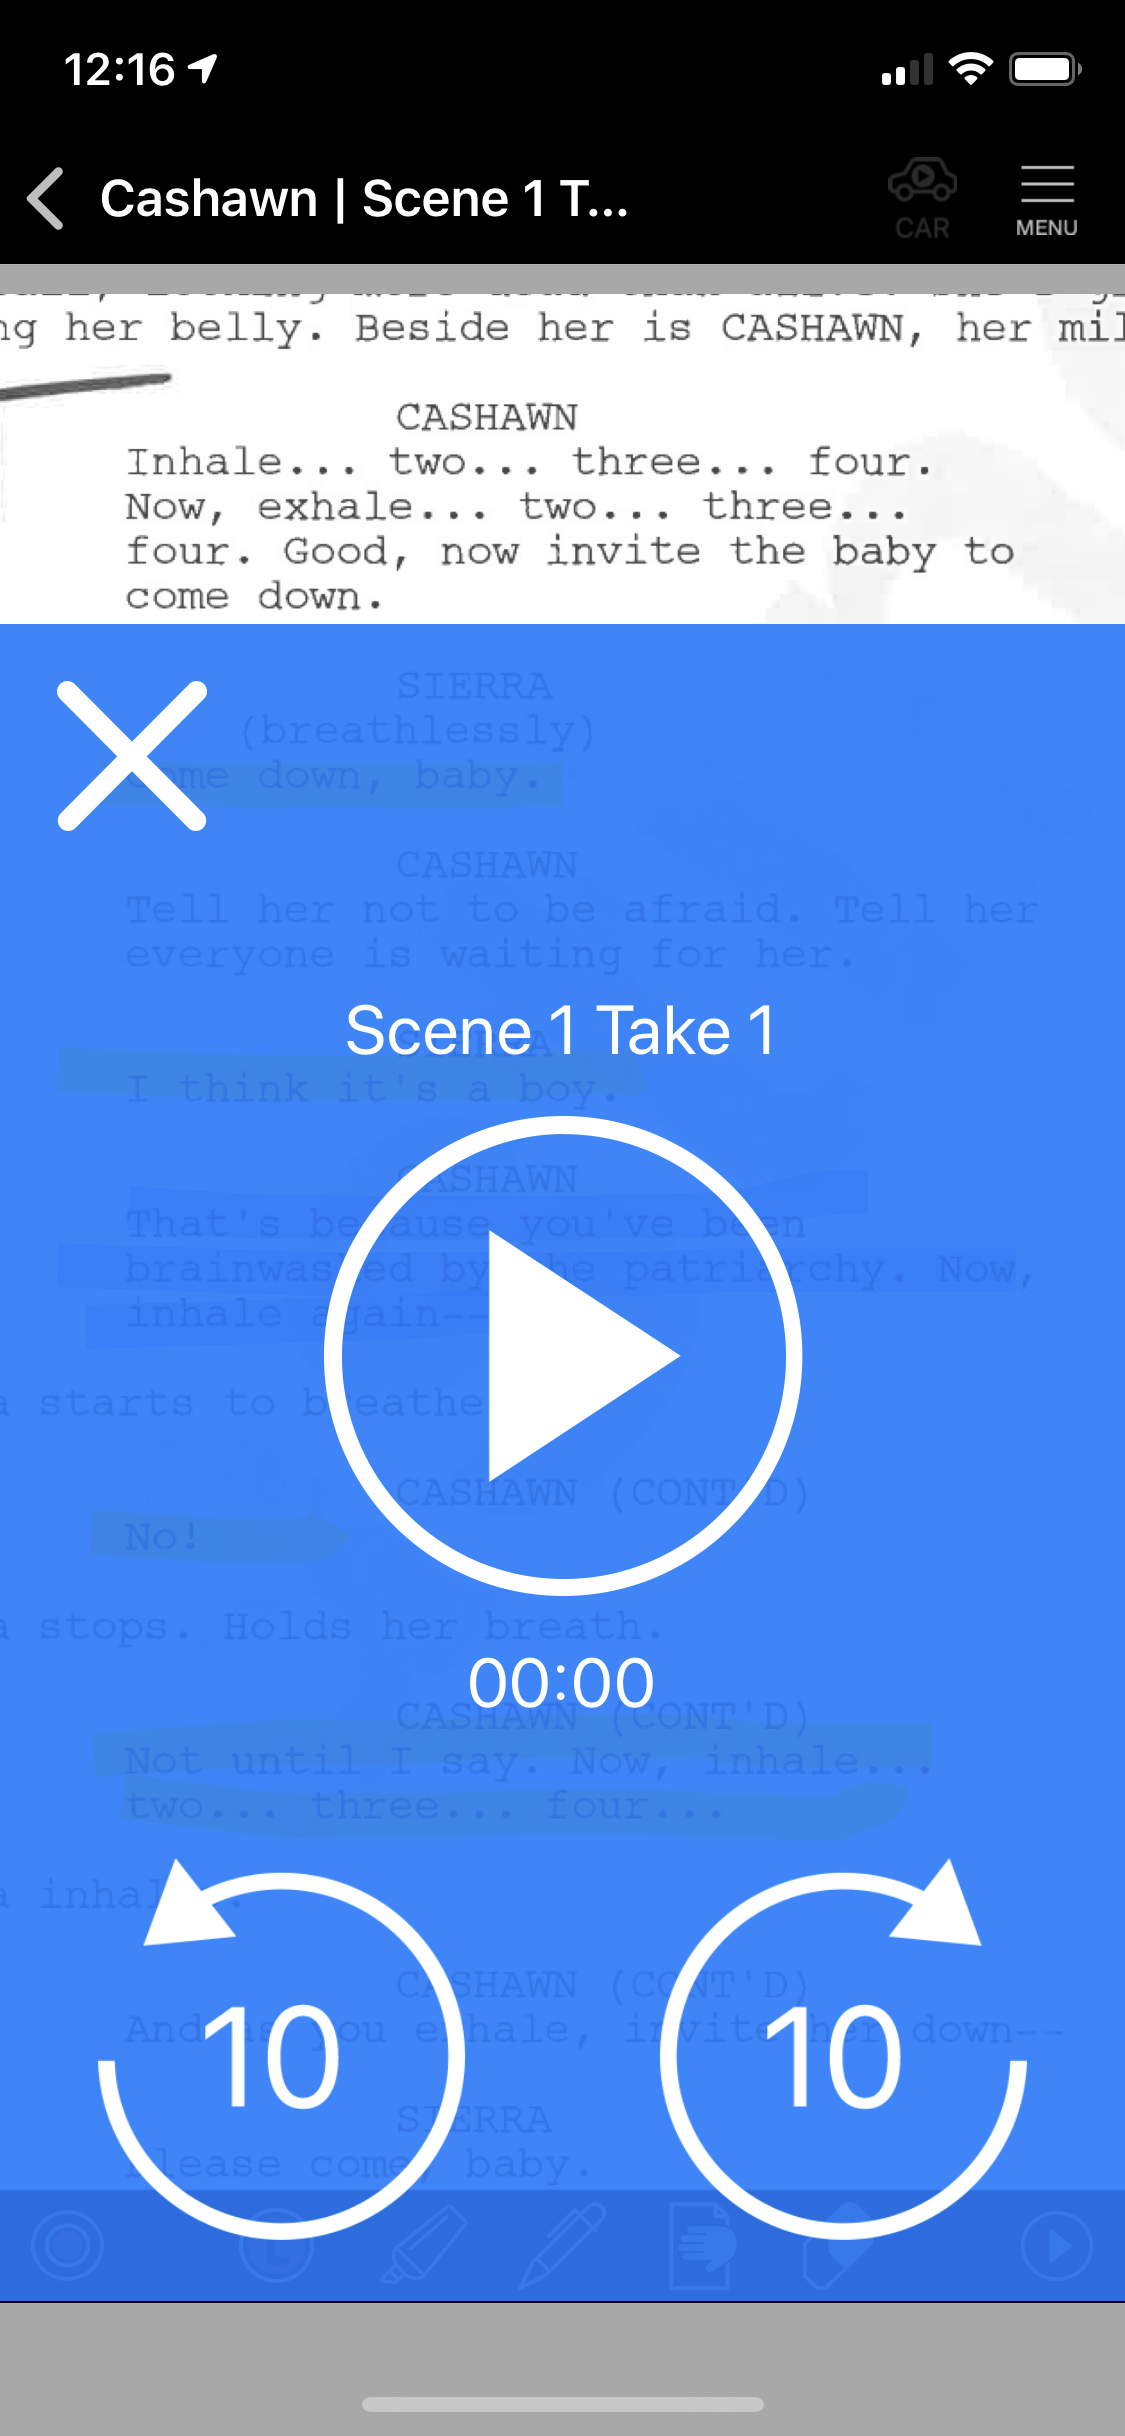
Covering the script is by design:
- You don’t want to be distracted by trying to read the script while driving, and
- You want controls that are large enough to be easily used without moving your eyes from the road
Also, none of the standard timeline controls will be accessible when in Car Play mode. This too is by design, to avoid distraction when driving.
To rehearse the scene once in Car Play mode, just tap on the big Play button, with the right facing triangle, and the scene will begin with the traditional Rehearsal® Pro ADR beeps.
Once the scene completes playback, it will automatically repeat. You don’t have to hit play again, just like any other full scene rehearsal.
Once playback begins, the Play button turns into a Pause button:

You can pause the scene at any time, and tap the Play button to resume.
If you want to go back or forward 10 seconds in the scene, tap the appropriate control below the Pause button:

To exit Car Play mode, tap the large X in the upper left hand corner of the blue control surface:
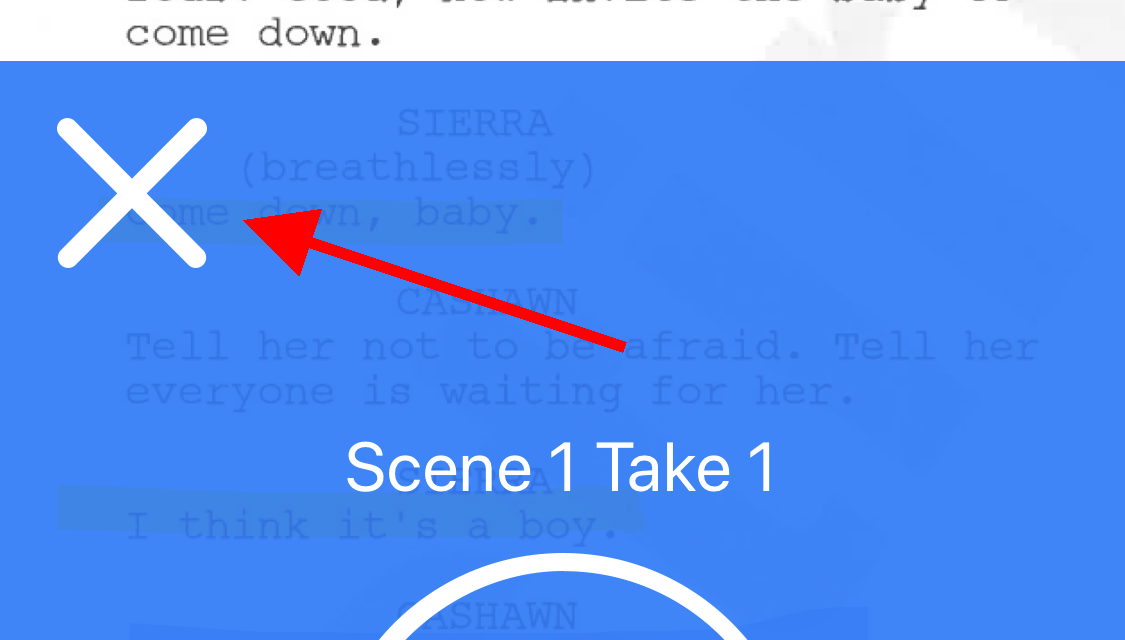
Be sure to exit Car Play mode only when it’s safe to use Rehearsal® Pro with its standard controls, when stationary.
And that’s it. Above all, be safe when driving – do not engage Car Play mode (or work with Rehearsal® Pro at all) when in difficult driving conditions.