Want to quickly get up and running with Rehearsal® Pro in just five simple steps?
Once you get your account registered and activated, and you know your unique script+username email address, it’s a snap.
We’re going to assume that you’ve been emailed a set of sides in PDF format from your agent or a casting office, or you’ve been mailed a script from the production team of a project you’re working on. If you’re not working with a PDF, refer to the additional help pages on the main help page.
Step 1: Email your script to Rehearsal® Pro
To start rehearsing with a script in Rehearsal® Pro, the first step is getting the script into the app. The most common way to do this is to email your script to your script+USERNAME email address. In a few minutes, your script will show up in your Add New Script area, ready to be added, prepped and rehearsed.
Here’s a video that shows you how, with a step-by-step below that:
Step by step
- Forward the email containing your script PDF file as an attachment to your script+USERNAME email address you were given when you registered with the Rehearsal® Pro app.
- Wait for the confirmation email that tells you the script is waiting to be added. Once you get that, go to the Rehearsal® Pro app, and tap on the Add New Script button toward the top of the Main Menu.
- You should see the new script at the top of the list.
Step 2: Adding your script to your My Scripts library
Adding that new script to your My Scripts library is a snap. Just tap on its name to select it, then tap the Add button in the upper right hand corner.
To speed things along, we’ll keep things really simple on the next few screens that pop up:
- Keep the script name the same (just tap Done on the Name the Script screen)
- No need to add any additional information with the Script Info screen that pops up next (just tap Save)
- Finally, tap Rehearsal (not Prep Script) to move right to highlighting your script.
Step 3: Highlighting your script and recording your scenes
Now that you have your script displayed on your screen, choose your orientation by rotating your device to either portrait (taller, with your device straight up) or landscape (wider, with your device on its side).
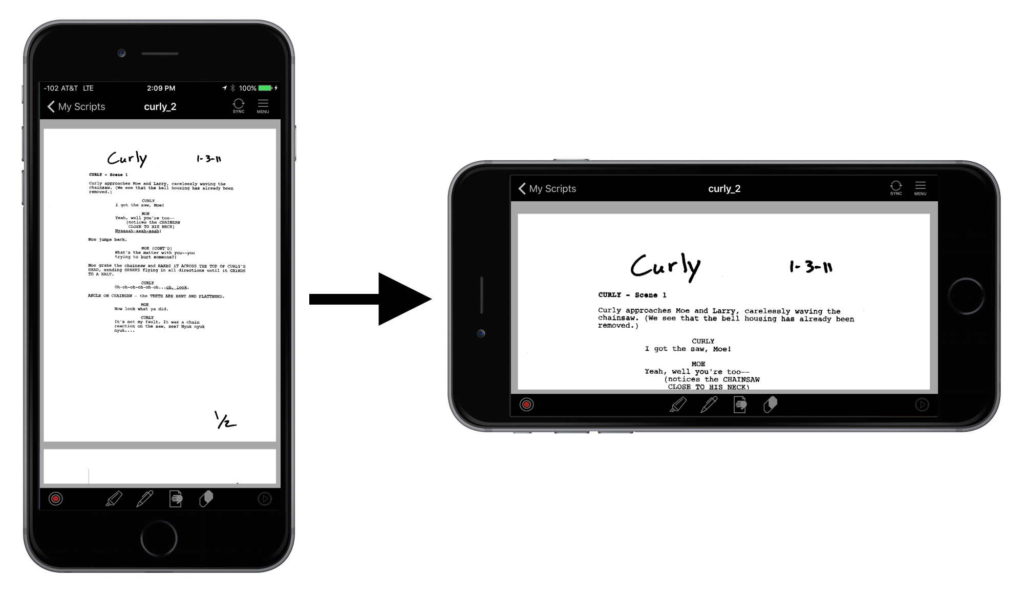
We’ll be using the landscape mode from here on, but you can certainly use Rehearsal® Pro in portrait mode if you prefer.
Scroll to where you want to begin highlighting your lines. You scroll by using your finger, and swiping from the bottom of your screen to the top:
Then, using two fingers to expand or contract the image on your screen, zoom in on your lines so they fill the width of your screen:

Then, tap and hold on the highlighting tool on the toolbar at the bottom of the screen. It’s the first tool in the set of four:

Tapping on it once selects the tool, with the last color used. In this case, after tapping, it shows yellow:

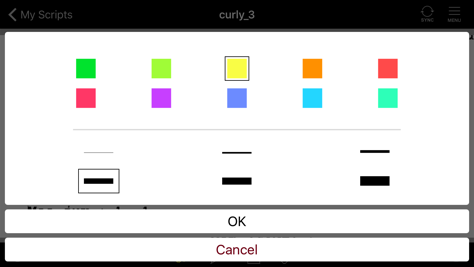
Tapping-and-holding on the highlight icon for two seconds, brings up the highlighter selection screen, where you can choose your color and thickness of the highlight:
Then, using the highlight tool, pretend that the tip of your finger is the tip of a real highlighter, and highlight your lines by simply swiping them from left to right (or right to left). You can scroll up and down in your script, but you can’t scroll left to right – your script is locked in that direction so you can apply the highlighting:
Step 4: Recording your scenes
Recording a scene for rehearsal is the way you prepare to learn your lines. You say both your lines, and your scene partners’ lines, and once recorded, you’ll play the scene back over and over to rehearse, and learn your lines.
So, once you’ve finished highlighting your lines and adding any other markup, only then will you create your scene(s) by recording them. Those recorded scenes will then be stored in My Scenes, listed under each script you’ve got. Until you record your first scene, there will be no listing of scenes under My Scenes. As you record more scenes, and as you add more scenes from more scripts, your listings in My Scenes will grow accordingly.
NOTE: You don’t need to print out your script, or use a printout you already have, and record using that printout! You’ll see the script on your screen, and you’ll voice the recording AS YOU SCROLL THE SCRIPT ON THE SCREEN WITH YOUR FINGER. Rehearsal® Pro will record both your voice, and the movement of your finger on the screen, and will sync those up to play them back when you rehearse.
Here’s a video that shows you the whole process:
And here’s how to do it step by step:
1. To record your scene, first scroll to where your scene begins. Make sure your lines are already highlighted, and you’re zoomed in to the width of the dialogue. Also, make sure no tools are active, like the highlighter, the scribbler or the eraser.
2. To begin recording, tap on the record button at the very left of the bottom toolbar. You’ll hear three ADR beeps to allow you to get set.
Once those sound off, the audio meter will start moving and you can start your recording.
3. Scroll the script as you need to to move through the lines.
REPEAT: You don’t need to print out your script, or use a printout you already have, and record using that printout! You’ll see the script on your screen, and you’ll voice the recording AS YOU SCROLL THE SCRIPT ON THE SCREEN WITH YOUR FINGER. Rehearsal® Pro will record both your voice, and the movement of your finger on the screen, and will sync those up to play them back when you rehearse.
4. Say your lines with no performance effort at all. Just flat, but with the same pace you expect to use when you audition or perform the scene.
Say your scene partners’ lines with all the richness you expect once you do your performance (which can mean no richness at all, if you expect the flat, fast read of an audition reader).
5. When you’re finished, tap on the stop button at the very right of the bottom toolbar. This button is a stop button only while you’re recording. It turns into a play button immediately after you stop a recording.
6. The moment you stop the recording, the Name The Scene screen will appear. You can simply tap Done if you want to let Rehearsal® Pro name your scene, or you can use the keyboard to rename it to anything you want.
When you tap Done, you’re returned to the scene you’ve just recorded, and you’re ready to rehearse.
Record a second version of the scene
Once you’ve rehearsed your lines with this recorded scene, to the point where you know the lines cold, record a second version of the scene, but this time just mouth your words, don’t say them out loud.
Why?
With this second scene, you have no voicing of your lines to distract you, but you do have the timing you need to really work the scene. And if you find that in changing your performance with the lines that your timing is now off, go ahead and record a third silent scene with your new pace and delivery.
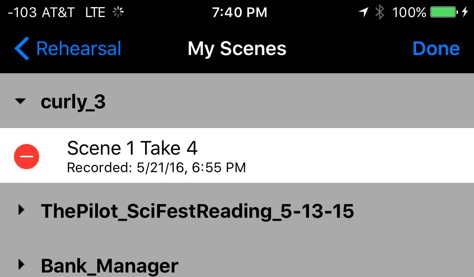
So, where does that scene get stored? They are in your My Scenes area, accessible from the front menu. They are grouped by script title, and in the reverse order that you record them.
Step 5: Rehearsing your scenes
Rehearsing a scene, learning your lines and discovering new ways to deliver them is the heart and soul of Rehearsal® Pro. You’ll play back the scene, then speak over your own lines and let the scene partners’ lines guide you through the scene. The playback will repeat automatically until you stop it, and the repetition will quickly get you off book.
To rehearse your scene, select the scene you want to use in your My Scenes area (not your My Scripts area):
That will load up your selected scene and display it, ready to play.
Here’s a video that shows you the whole process:
And here’s the step-by-step process:
• To rehearse any scene, select it in My Scenes. Once the scene loads, tap on the play button at the very right of the bottom toolbar. You’ll hear three ADR beeps to allow you to get set, then your scene will begin.
• You’ll notice both a timer, and a progress button that travels along the bottom of your screen. If you go up on a line and want to go back, just drag that progress button to the left. Likewise, if you want to jump to a later point in the script, just drag the button to the right.
• As you first listen to your scenes, you can watch the script scroll by, and say your lines as they come up. Don’t worry about your performance just yet – that will naturally flow into your work as you repeat the process.
• Let Rehearsal® Pro say your scene partners’ lines. You’ll begin to remember the ends of their lines as the aural cues for your lines.
• Once you get to the end of the scene, Rehearsal® Pro will immediately repeat the scene, with the ADB beeps giving you a few seconds to reset yourself emotionally, as you restart the scene.
• Do this repeatedly until you are well versed in the lines, and you’ve started to feel out the way you’re going to perform the scene.
• When you’re finished, tap on the stop button at the very left of the bottom toolbar. This button is a stop button only while you’re playing back. It’s the record button when recording.
For more detailed instructions on how to use Rehearsal® Pro, keep clicking on the next article below, and read and watch all the videos – you’ll be a Rehearsal® Pro in no time!