The My Scenes button on Rehearsal® Pro leads you to the screen that allows you to manage and edit all of the scenes you’ve recorded for rehearsal.
Remember, once you’ve finished highlighting your lines and adding any other markup, only then will you create your scene(s) by recording them. And only then will those recorded scenes be stored in My Scenes, listed under each script you’ve got. Until you record your first scene, there will be no listing of scenes under My Scenes. As you record more scenes, and as you add more scenes from more scripts, your listings in My Scenes will grow accordingly.
Here’s a video that gives you an overview of My Scenes:
My Scenes’ features
Here’s what My Scenes looks like in normal selection mode:
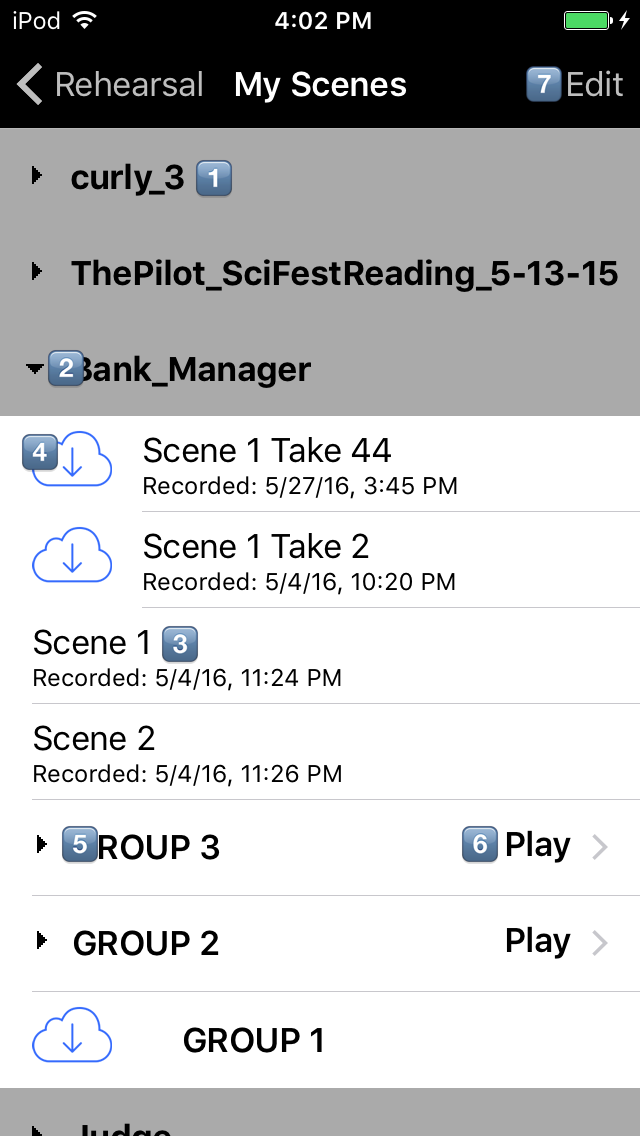
- The Script Title: each scene you’ve recorded with a particular script is organized here
- The Open button: when tapped, shows you all the scenes you’ve recorded for that particular script.
- The Scene Title: when tapped, takes you to the scene for rehearsal or further markup (highlighting, recording etc.)
- The Cloud icon: lets you download the latest updates you’ve made to the scene on other devices
- The Group: created when you combine two or more scenes in a group. Opens to allow individual scenes to be accessed.
- The Group Play button: when tapped, takes you to the scenes, and plays them as a group, then repeats continuously.
- The Edit button: when tapped, displays My Scenes in edit mode, as shown below.
Here’s what My Scenes looks like in edit mode (after tapping the Edit button):
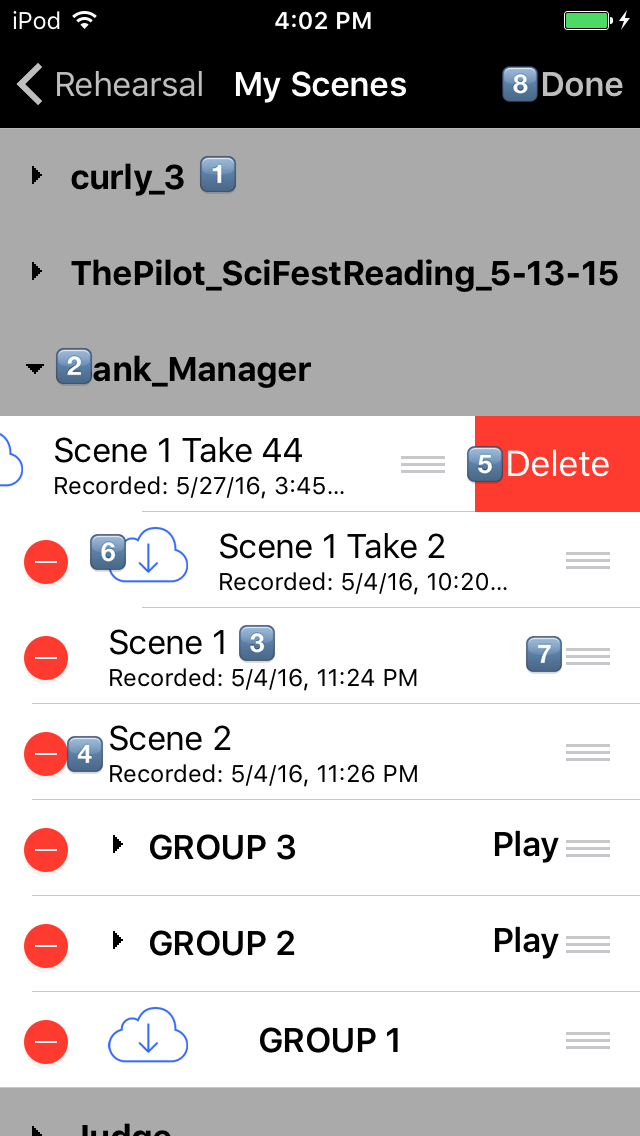
- The Script Name: each scene you’ve recorded with a particular script is organized here.
- The Open button: when tapped, shows you all the scenes you’ve recorded for that particular script.
- The Scene Renaming button: tap on the scene name to rename the scene.
- The Select for deletion button: tapping on that “circle with a minus sign” slides open the Delete button.
- The Delete button: lets you delete a scene you’ve recorded.
- The Cloud icon: lets you download the latest updates you’ve made to the scene on other devices
- The Reorder thumb: tapping and dragging with this control lets you move a scene to be displayed in whatever order you want, within the script.
- The Done button: tapping this button returns you to normal selection mode.