Linesets is a way to record and learn your lines that is slightly different than recording all the lines in whole scenes. With Linesets, you say each of your lines, and each of your scene partners’ lines, individually (as opposed to the entire scene) and once recorded, you’ll play each line as you need it, tapping your device to play each line, automatically advancing to the next, to rehearse and learn your lines.
NOTE: this was an often requested feature. It has its pros (you don’t need to time your line when using this process) and cons (we’re not big fans of having to tap on your device while doing your scene, as it takes your attention slightly off the scene itself), but we want you to have choices.
Linesets are collections of individually recorded lines, both yours and your scene partners, and are individually played back, re-arrangeable, replaceable, and editable. To play back each line as you work through the scene, you just tap anywhere on the screen to play the next line. Once that line plays, the next line is then immediately ready to play, again by tapping anywhere on your screen. We’ll show you how to do all that below.
Here’s a video that shows you how to use linesets (then, below that is a step-by-step explanation):
So, with linesets, as with scene recording, once you’ve finished highlighting your lines and adding any other markup, you’ll then record each line, creating a Lineset, by recording them individually. You can make any number of linesets, for any number of scenes in your script. Those recorded linesets will then be stored in each script, and are created, edited and used by revealing the lineset interface. You do this by tapping on the red-circled (L) on the bottom toolbar in the app:
![]()
When you tap on that (L) icon, you’ll start the process by adding a lineset.
As you record more linesets, and as you add more scenes from more scripts, your lineset list in the script will grow accordingly.
NOTE: You don’t need to print out your script, or use a printout you already have, and record using that printout! You’ll see the script on your screen, and you’ll voice the recording AS YOU SCROLL THE SCRIPT ON THE SCREEN WITH YOUR FINGER. Rehearsal® Pro will record both your voice, and the movement of your finger on the screen, and will sync those up to play them back when you rehearse.
Before you begin, make sure your lines are already highlighted, and you’re zoomed in to the width of the dialogue. Also, make sure no tools are active, like the highlighter, the scribbler or the eraser.
Here’s how to use the lineset feature, step by step:
1. To create a new lineset, open the lineset interface by tapping on the red-circled (L). Then, tap on Add New Lineset:
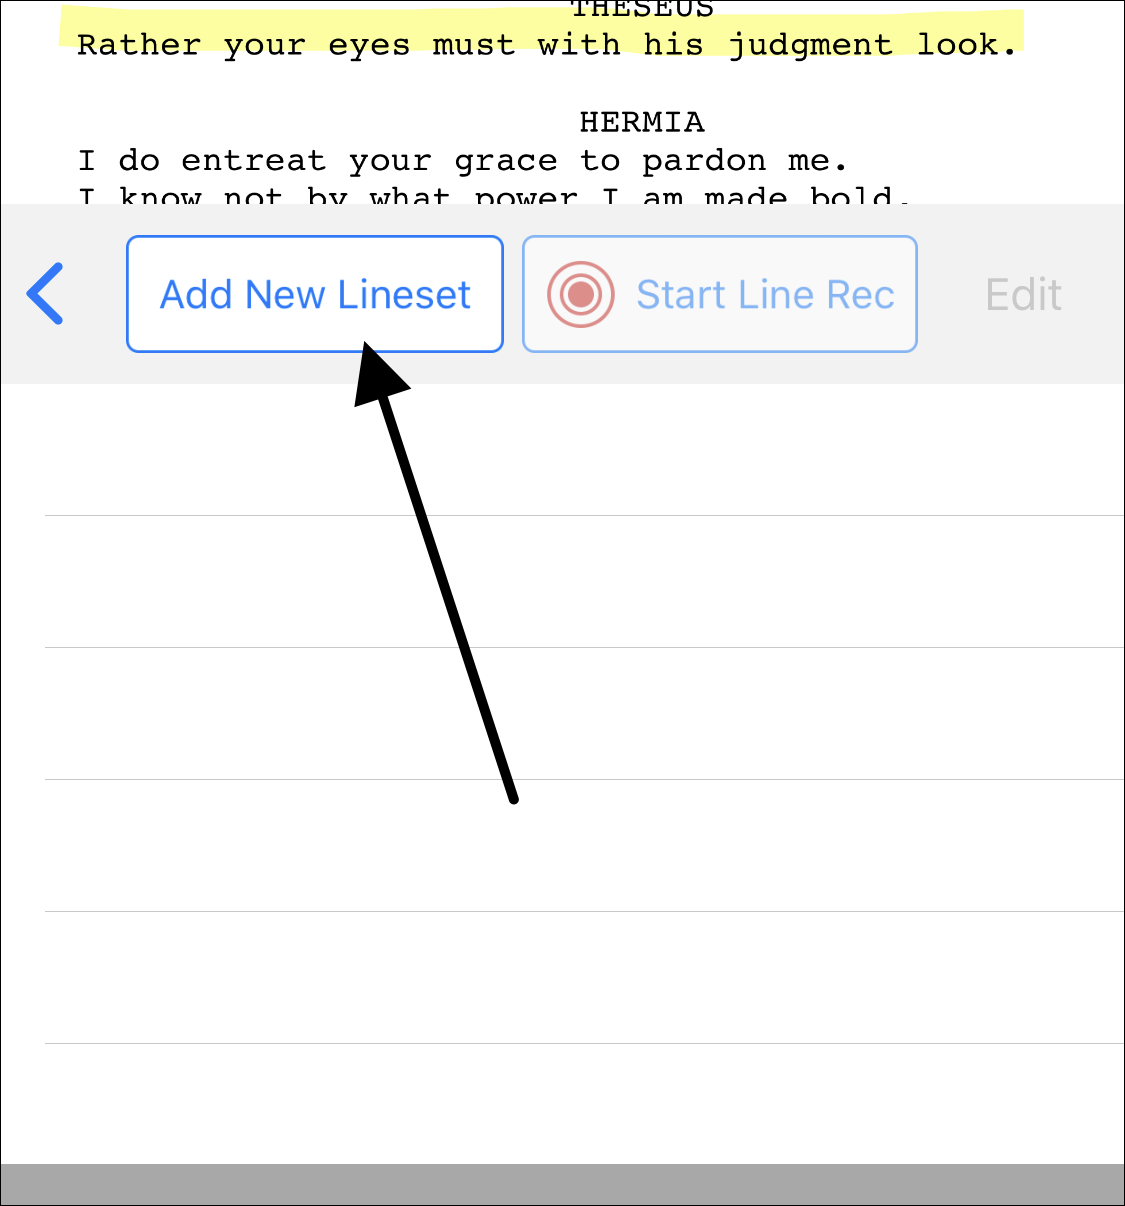
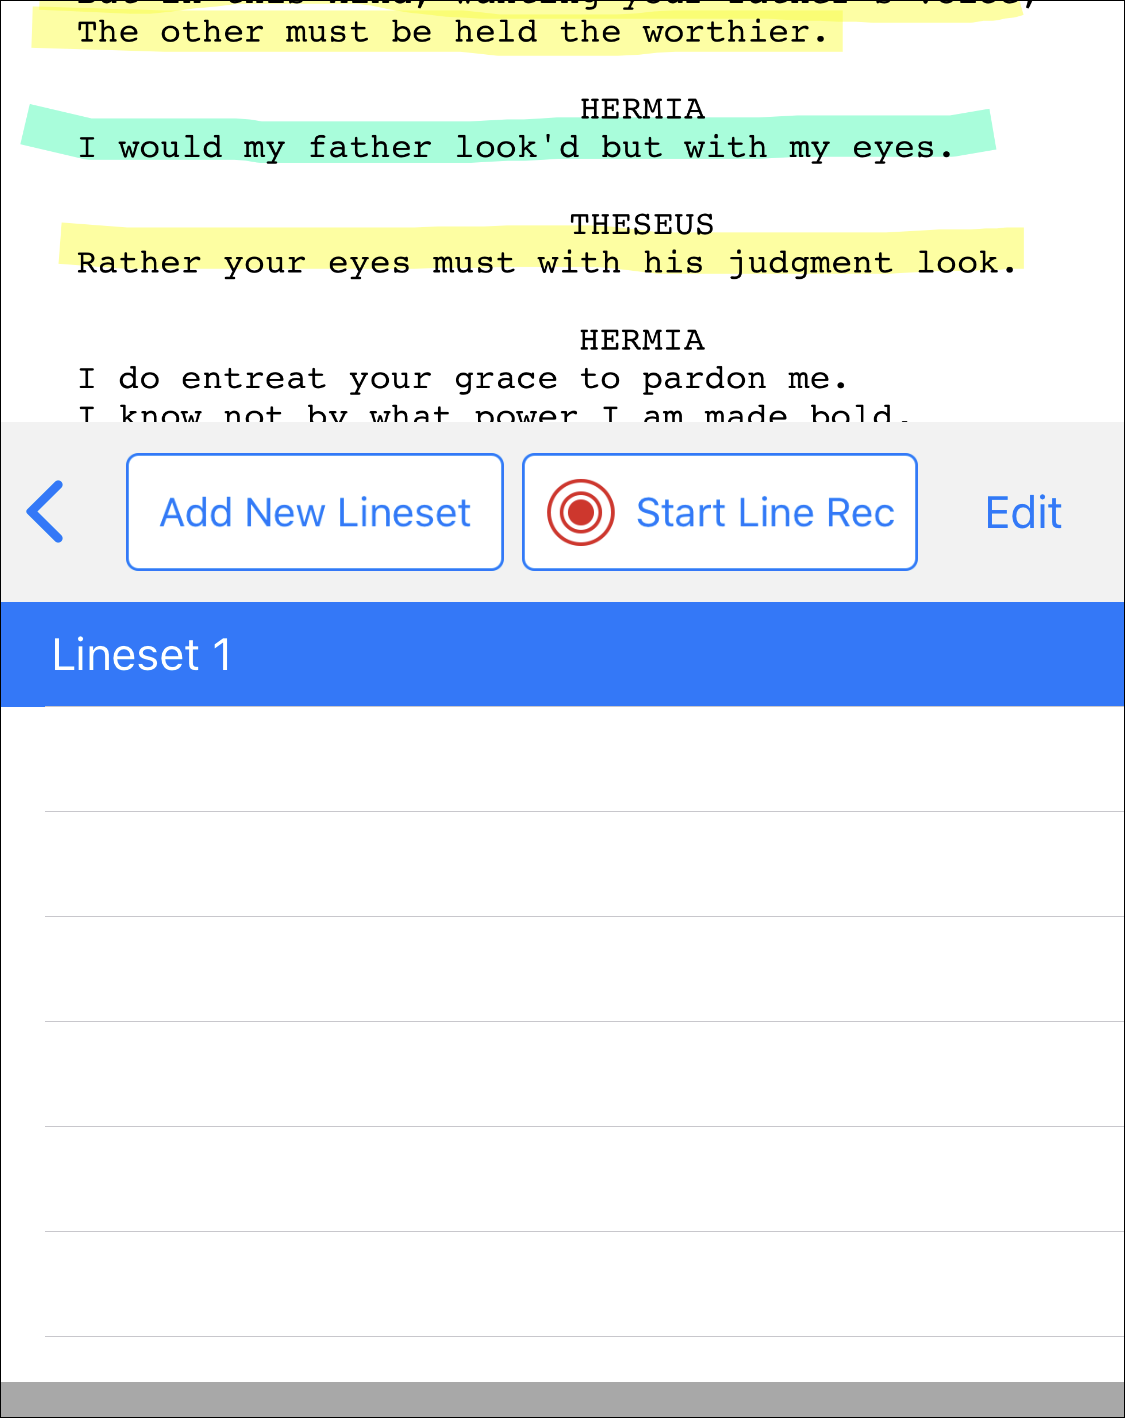
Your first one will be called Lineset 1, but you can change that name later to something more useful, like Scene 4 Pg 12. Let’s use the default name for now. Here’s what your screen will look like:
2. Once you’ve created your lineset, you then record each line individually, To do this, tap on the Start Line Rec button:
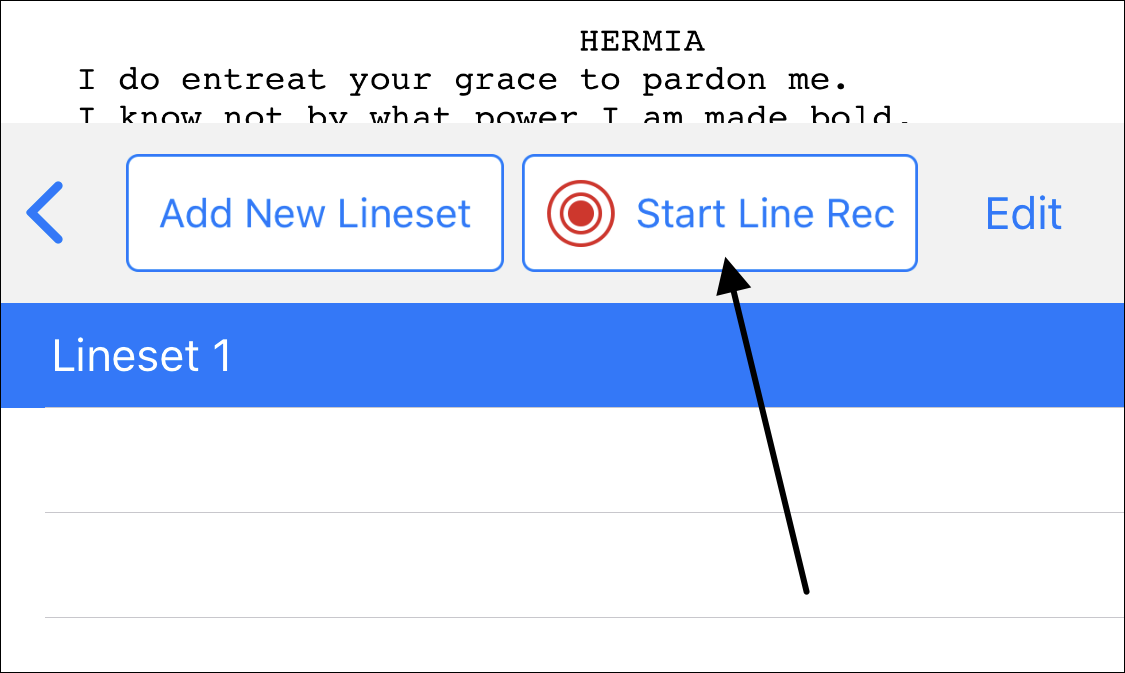
You’ll hear three ADR beeps to allow you to get set. Once those sound off, you can start your recording. When you’re finished recording the line, tap the same button, which will now be seen as Stop Line Rec:

You can scroll the script as you need to to move through the lines. Repeat this line-by-line individual recording for all the lines in your scene.
As with full scene recording, you will want to say your lines with no performance effort at all. Just flat, but with the same pace you expect to use when you audition or perform the scene.
Say your scene partners’ lines with all the richness you expect once you do your performance (which can mean no richness at all, if you expect the flat, fast read of an audition reader).
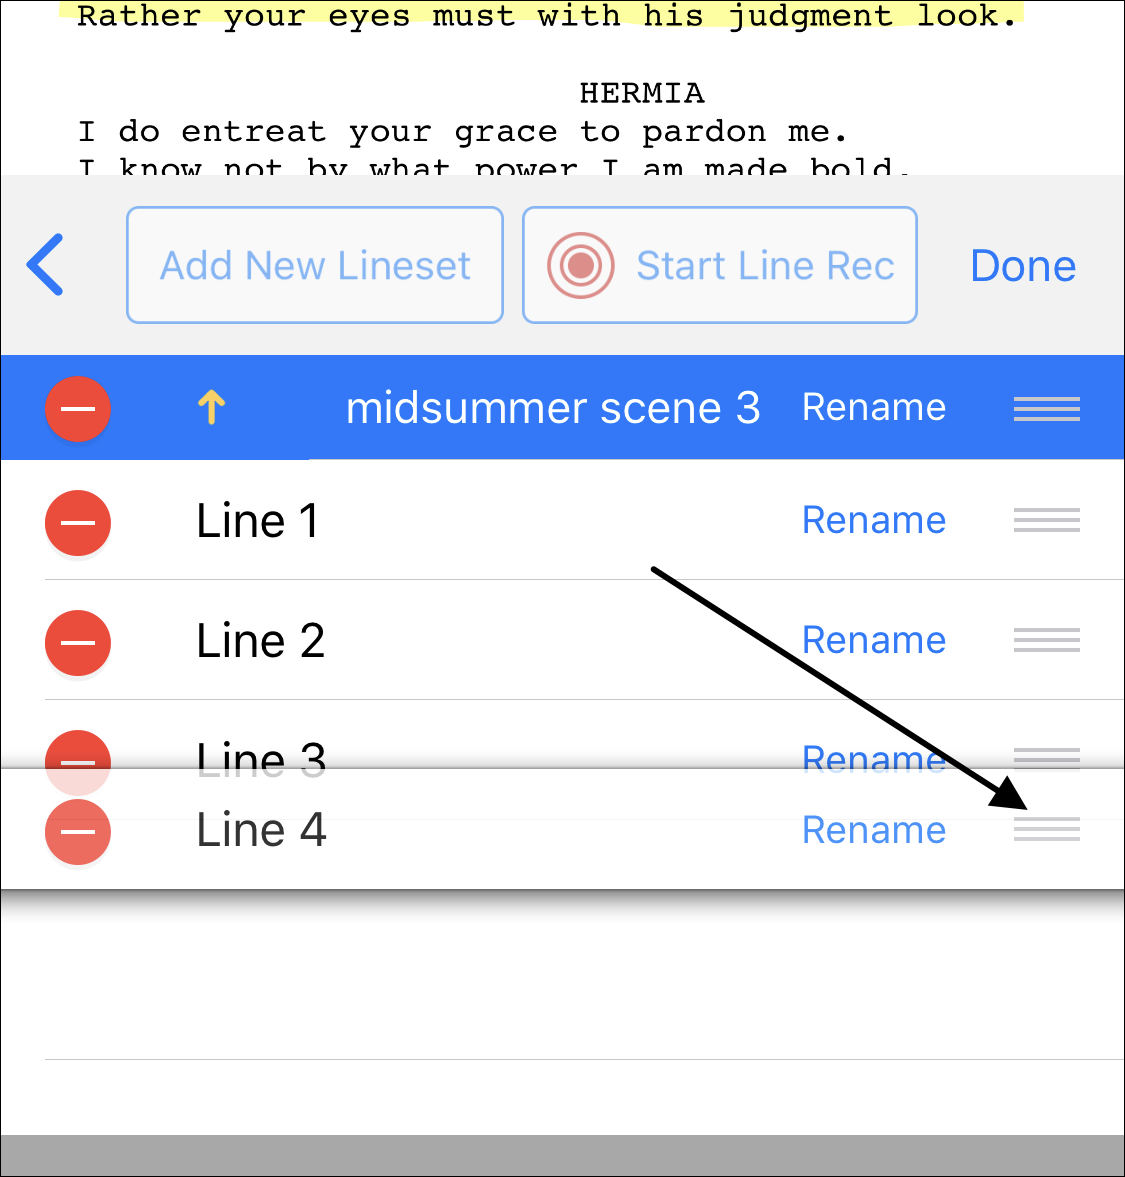
3. As you record each line, you’ll notice both yellow and green arrows occasionally appearing. Those are to let you know when the app is saving your work to the cloud. They are yellow when they are getting ready to sync, and green when syncing. They disappear once the sync is complete:
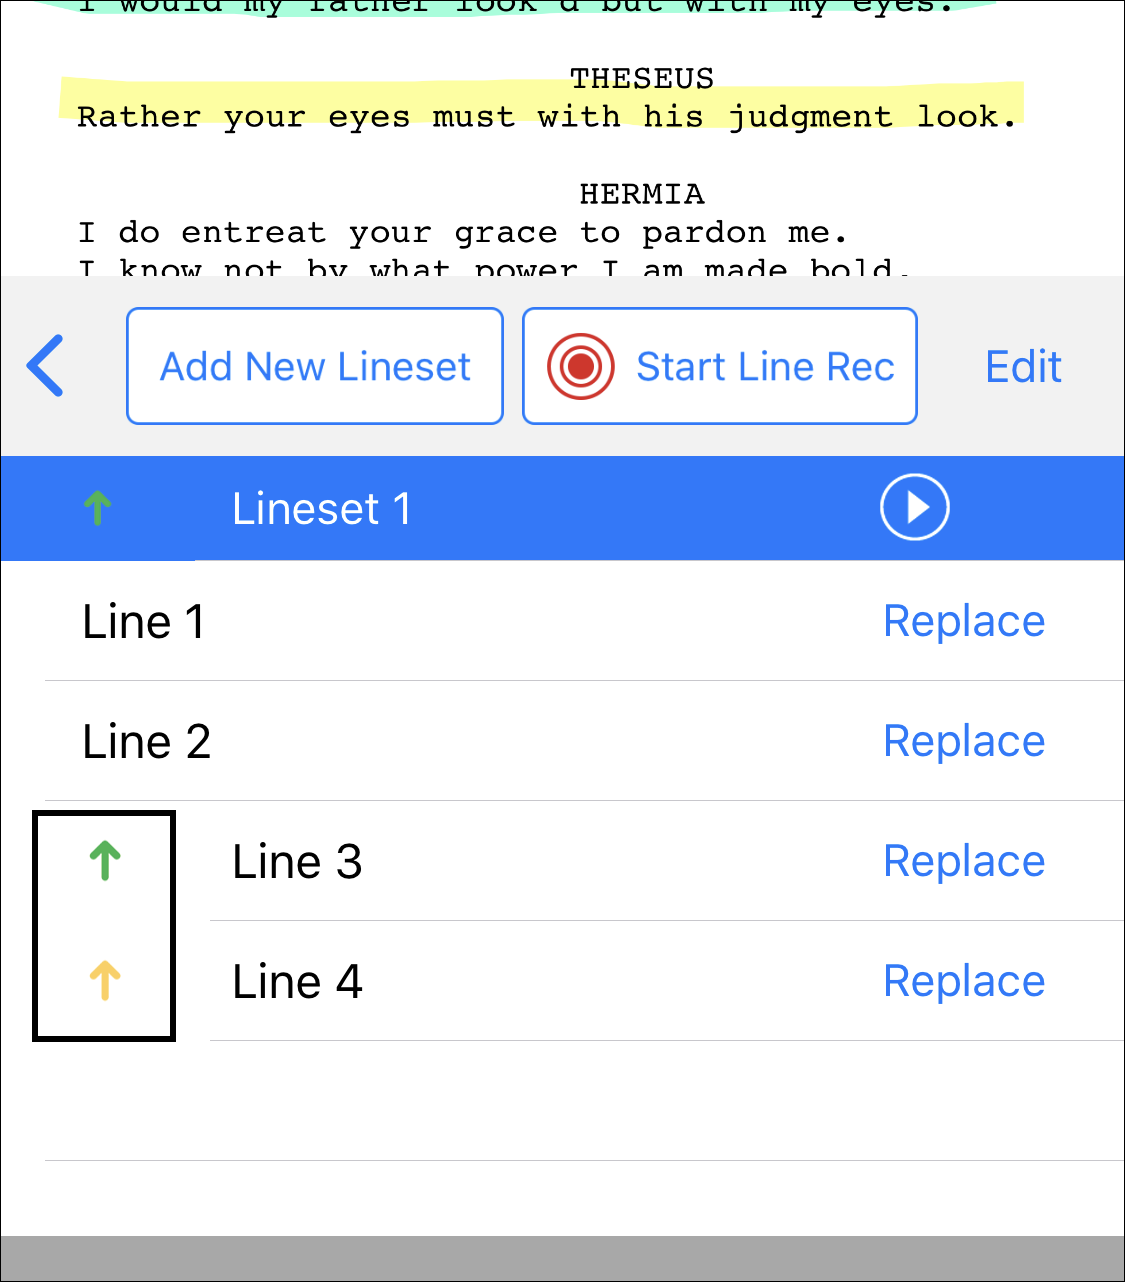
When you’ve finished and have your lines in order, they will be listed under your lineset’s name and will be ready for playback. You can hide and show the lines themselves by tapping on the lineset’s name.
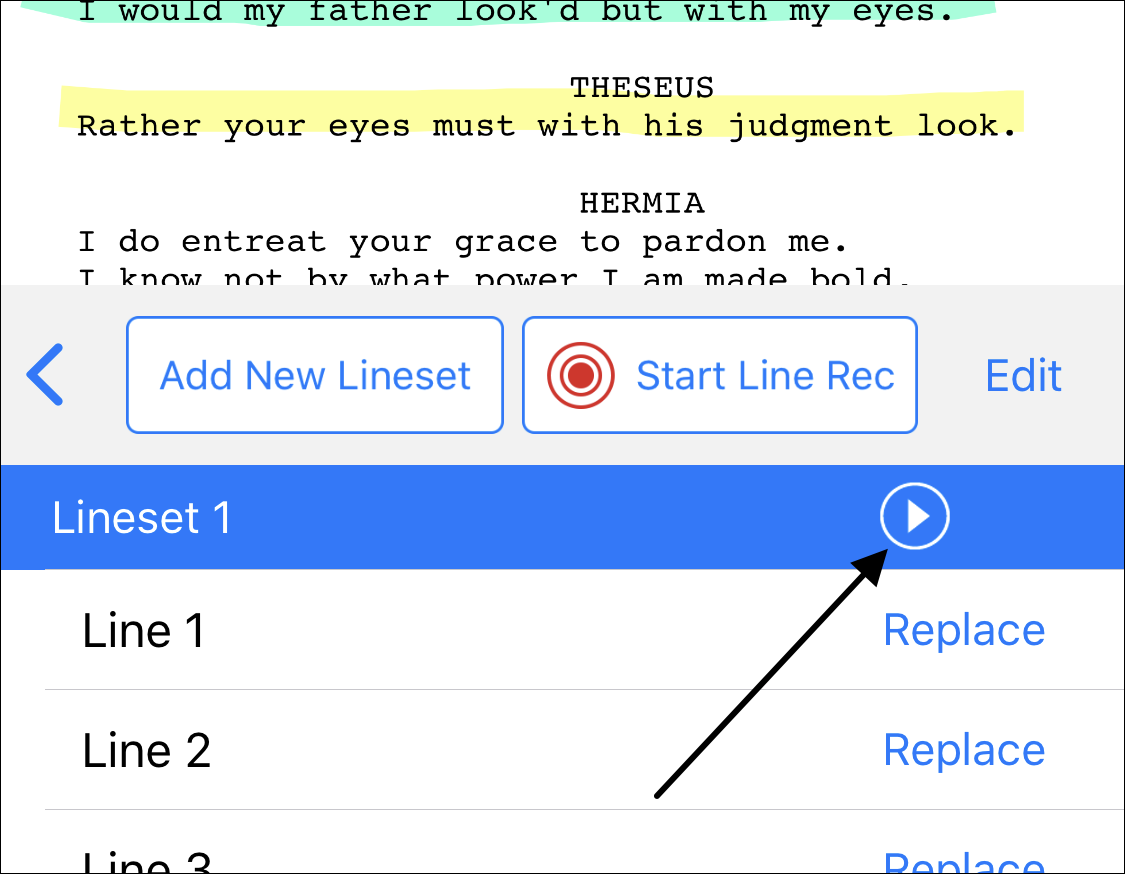
4. To play the lines back and rehearse the scene/lineset, first tap on the play button to the right of your lineset’s name:
When you do, you’ll now see the playback interface, and you’ll hear the ADR beeps to allow you to get ready to perform.
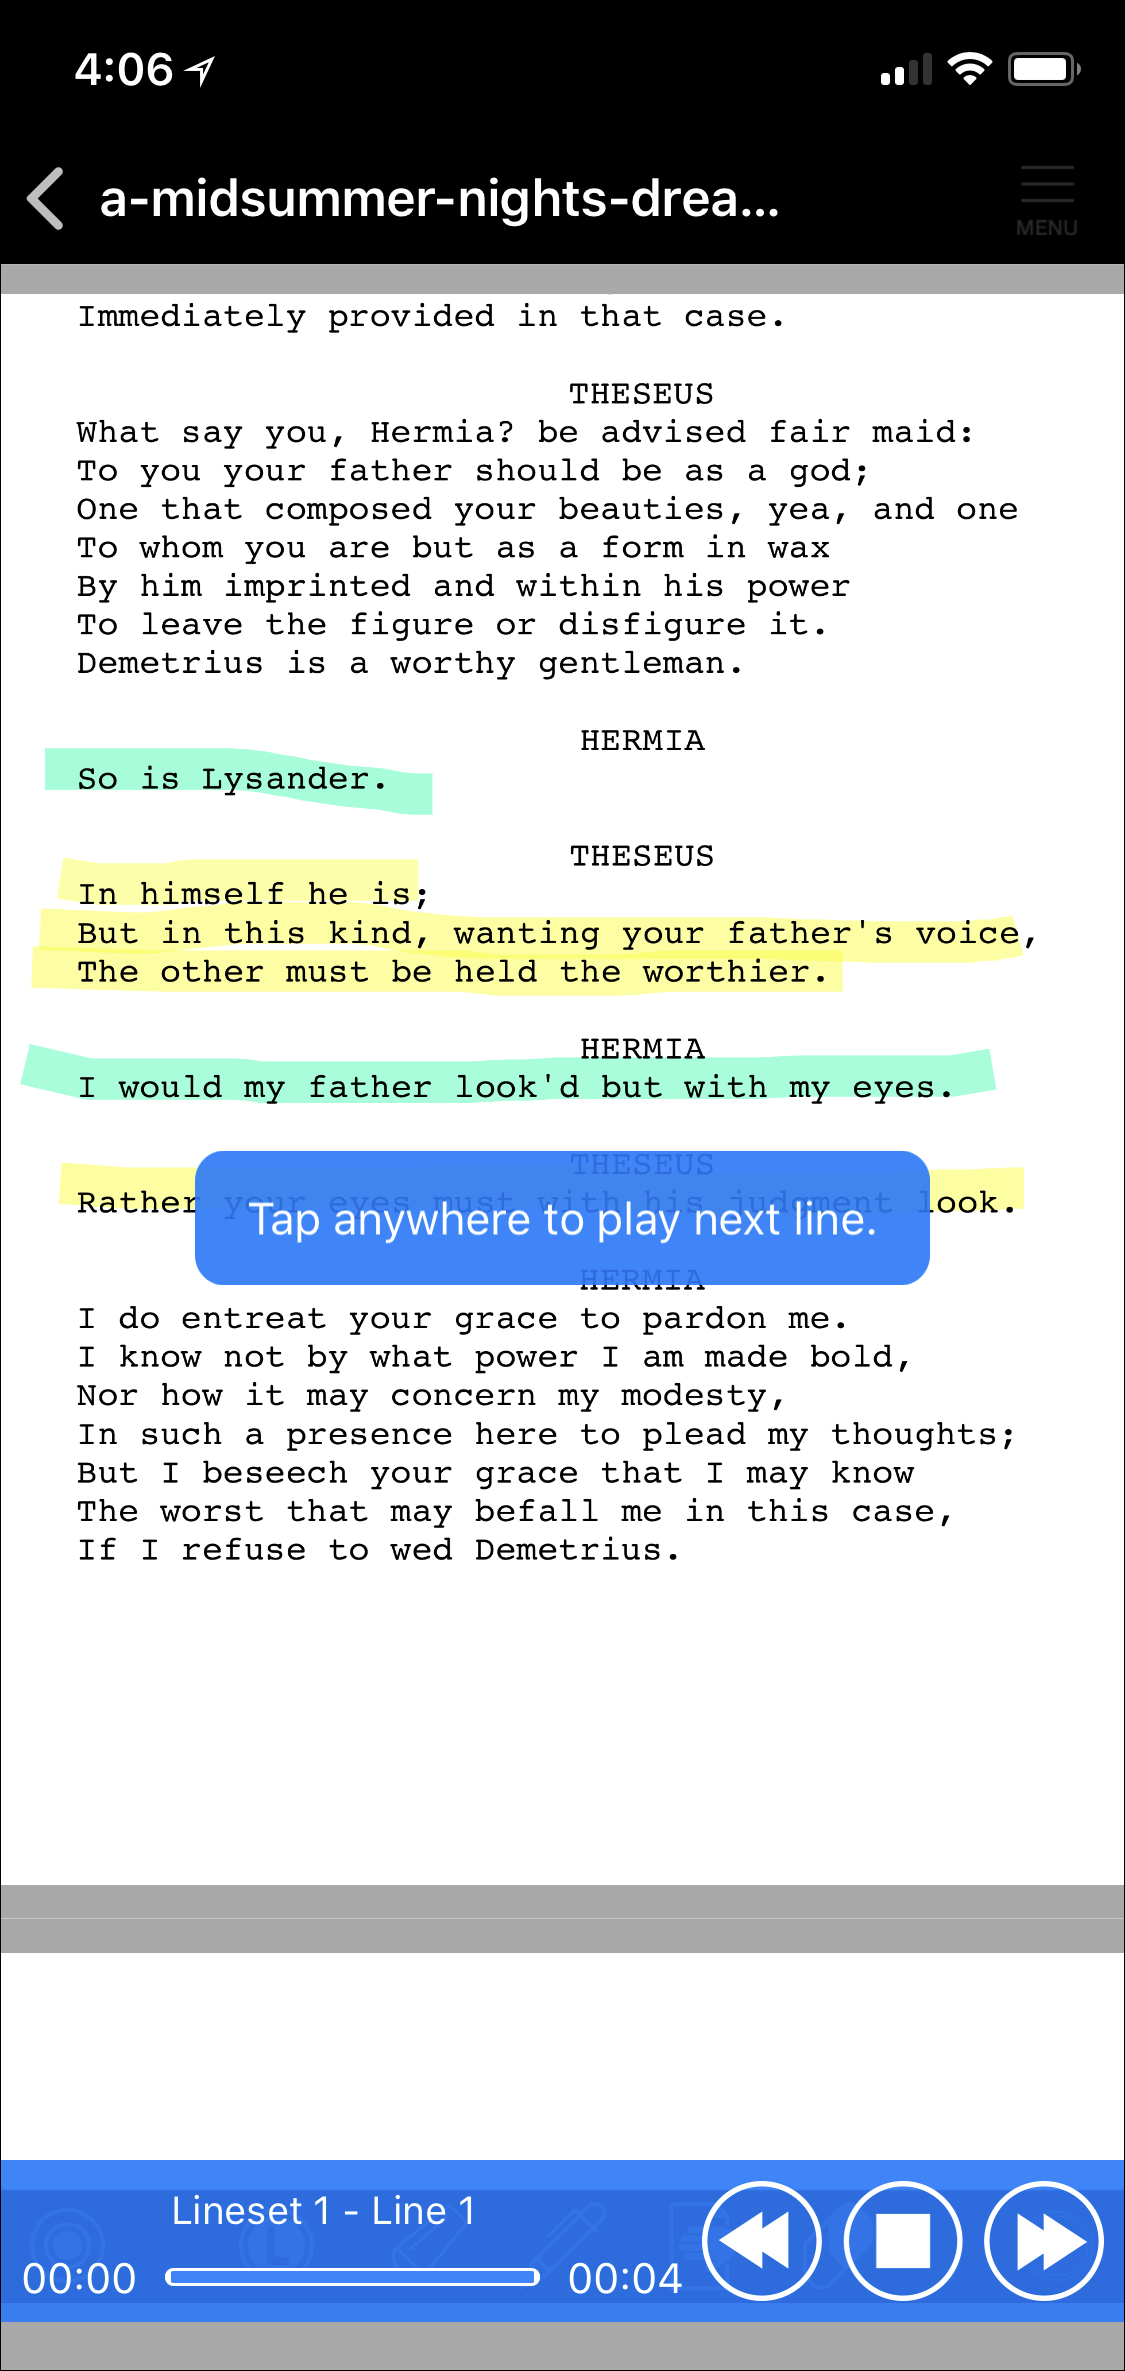
5. Note that the first line in the lineset could be your line, or it could be your scene partner’s. Because of that, unlike in full scene recordings, the first line won’t play directly after the ADR beeps. Instead, you see a blue button on the screen that says Tap anywhere to play the first line – when you’re ready, do that. You can tap anywhere on the script itself, but not on the title bar, or on the controls in the blue lineset playback interface at the bottom of your screen:
6. Once the line starts playing, and then finishes, the next line will be queued up, but now, you’ll see a large play button on your screen. You don’t have to tap directly on that, but you can tap on it or anywhere on the screen, and the next line will play. Then, the next line will be queued up, and so on:

If any line is your line, you’ll want to talk over it as you learn the lines. If it’s your scene partner’s line, you want to listen to that line.
7. Once you’ve played all the lines in the lineset, the lines will queue up again, beginning with the first line in the lineset. Go ahead and repeat the playback process until you’ve learned your lines.
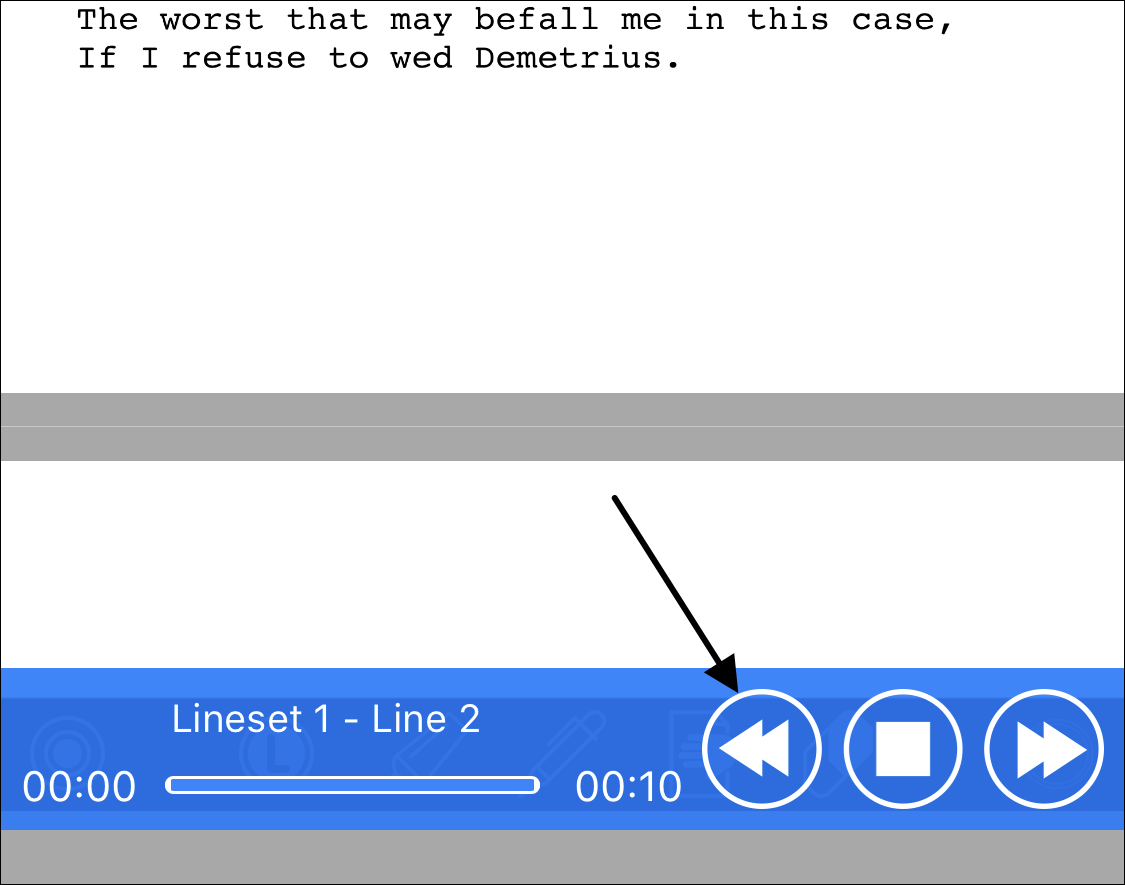
8. if you go up on a line and want to hear it again, use the rewind button on the playback interface. You can then replay the line by tapping anywhere on the screen:
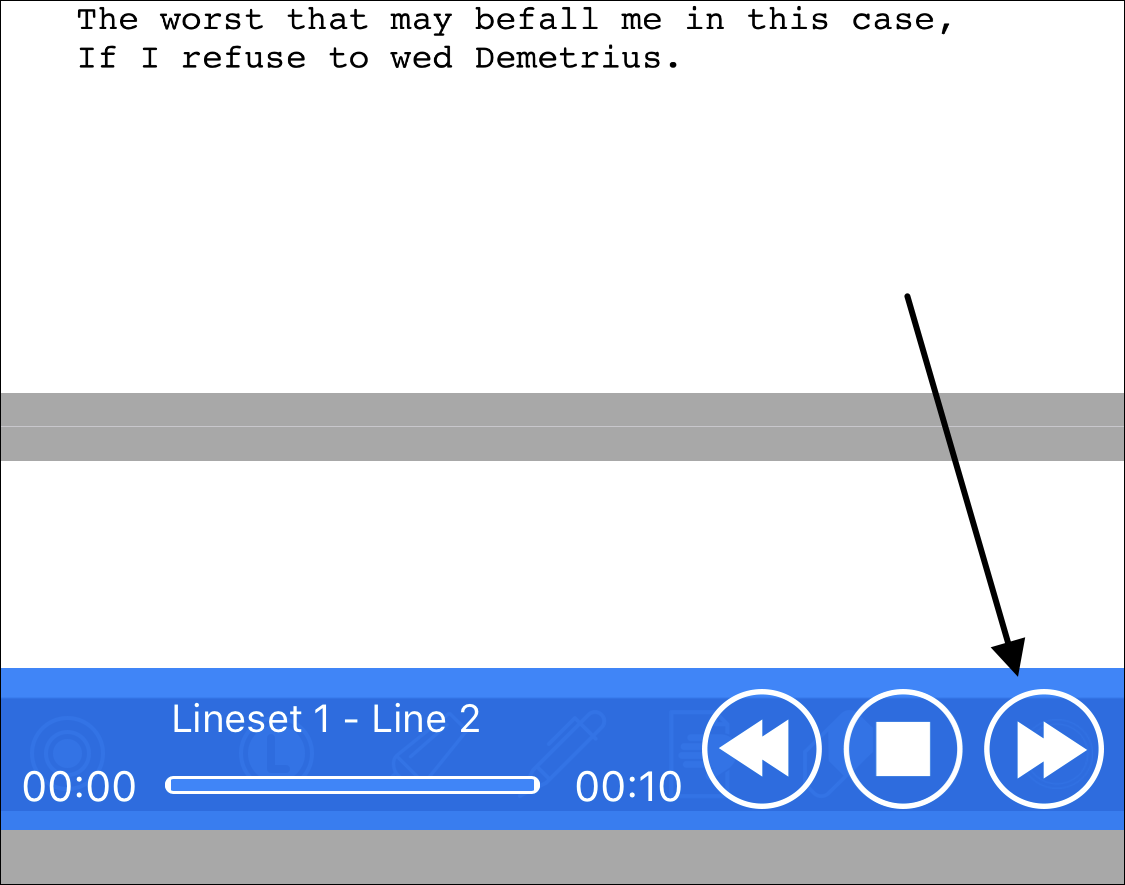
If you want to skip a line, use the fast-forward button on the playback interface. It will jump ahead and queue up the next line for you, and you’ll then tap anywhere on the screen to play it:
9. Once you’re finished rehearsing with the lineset, tap on the Stop button on the playback interface:
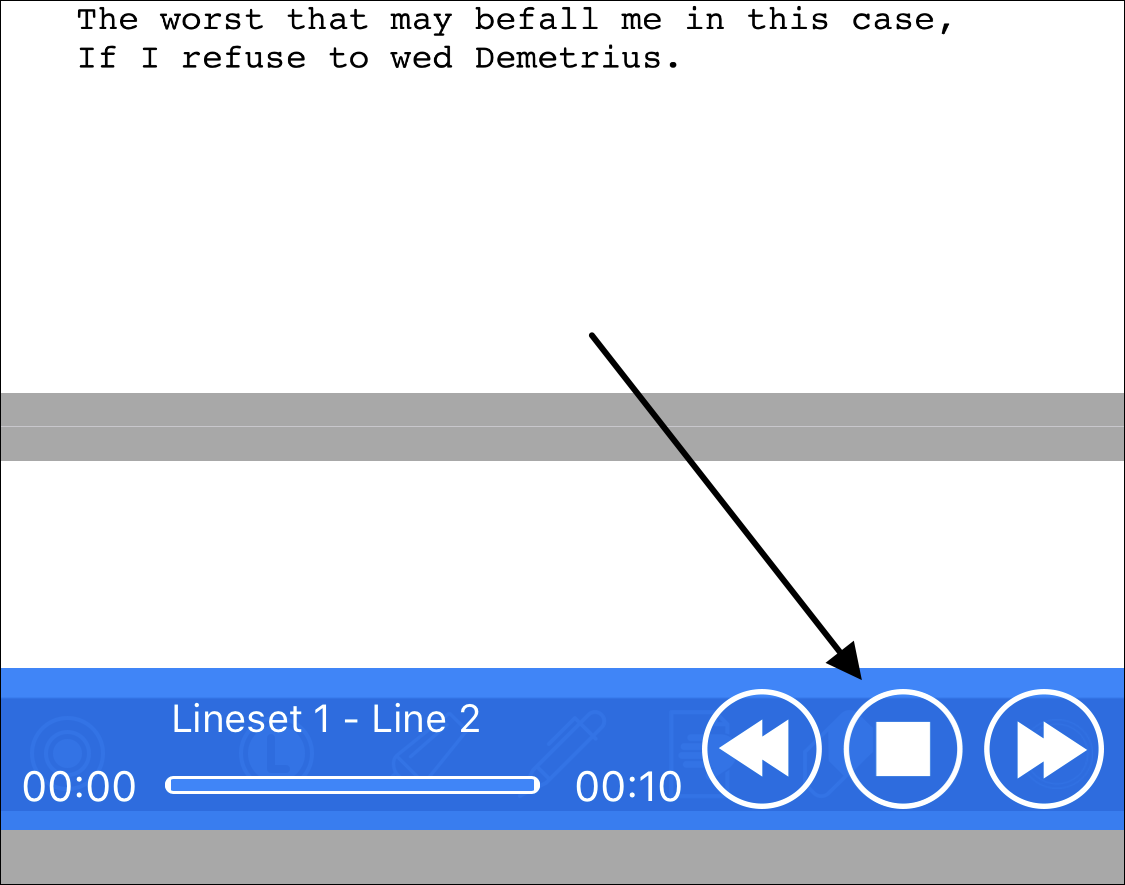
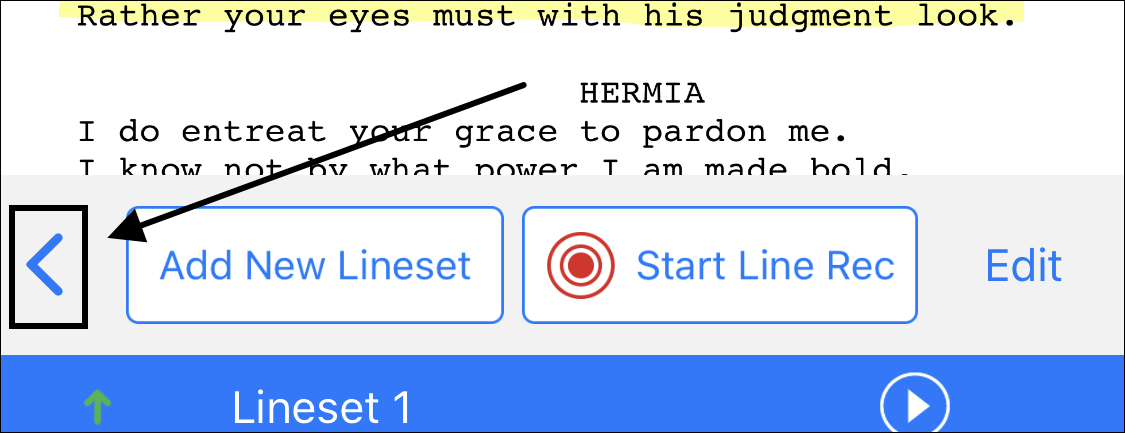
You’re returned to the lineset recording interface. If you want to leave the lineset feature entirely and go back to your script, just tap on the left-facing carat to the left of the Add New Lineset button:
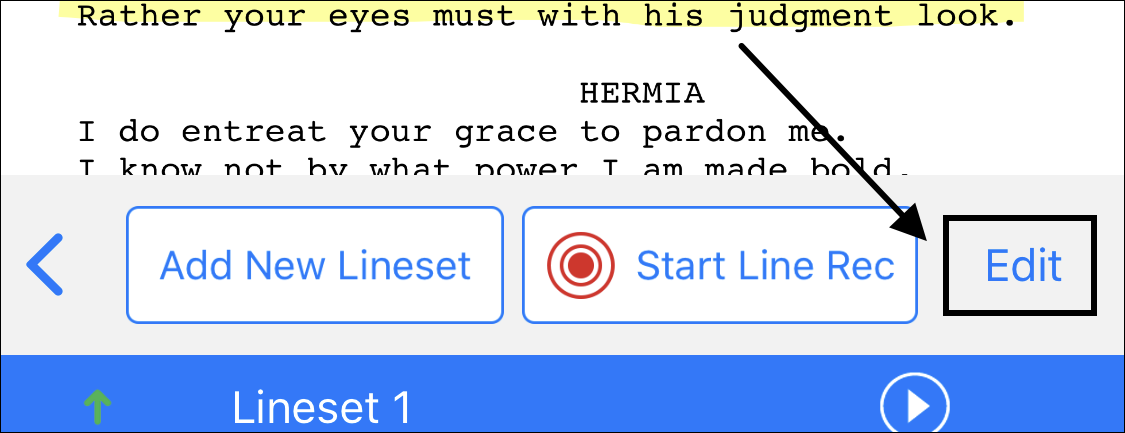
10. Once you’ve done your recording, you might want to change the names of your lineset or your lines, or their order. To do that, tap on the Edit button to the right of the Start Line Rec button:
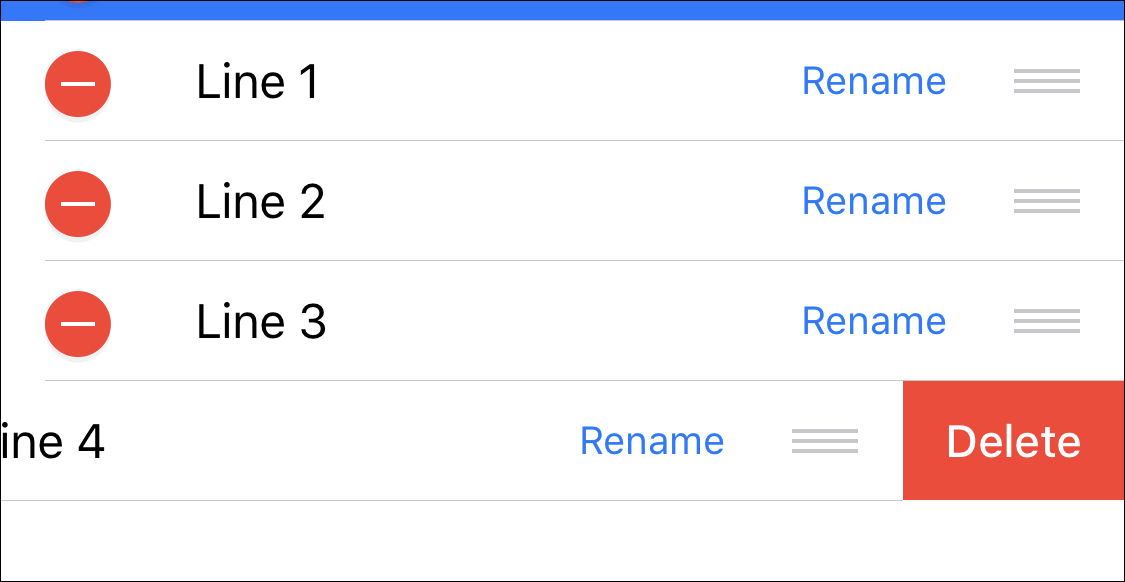
You will see a red deletion circle to the left of each item, you’ll see a Rename button, and you’ll see three-line handles you can grab to re-arrange the lines (and you’ll see the same controls for the lineset itself):
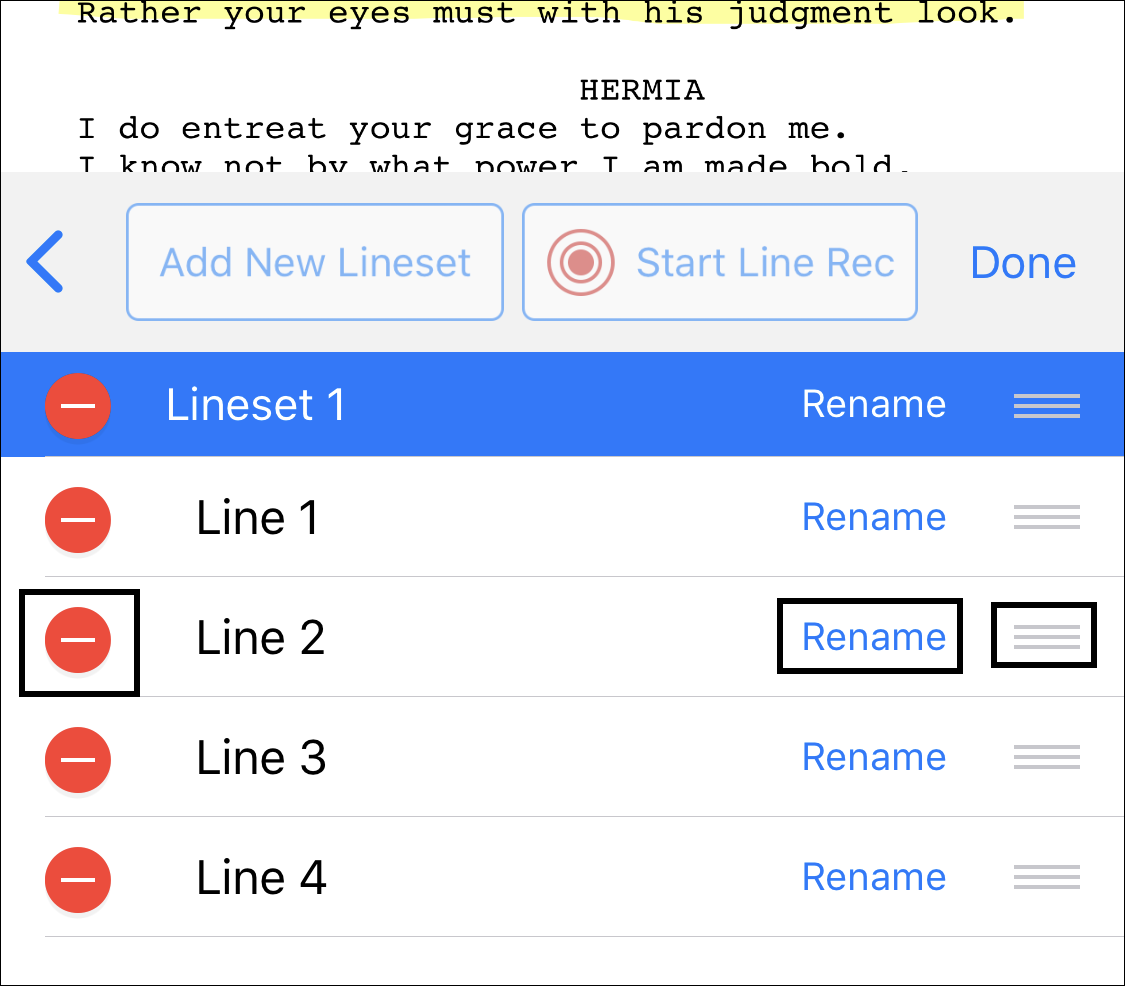
If you want to delete a line, or an entire lineset, just tap on the deletion circle next to its name, and confirm the deletion by tapping on the Delete button that appears to the right:
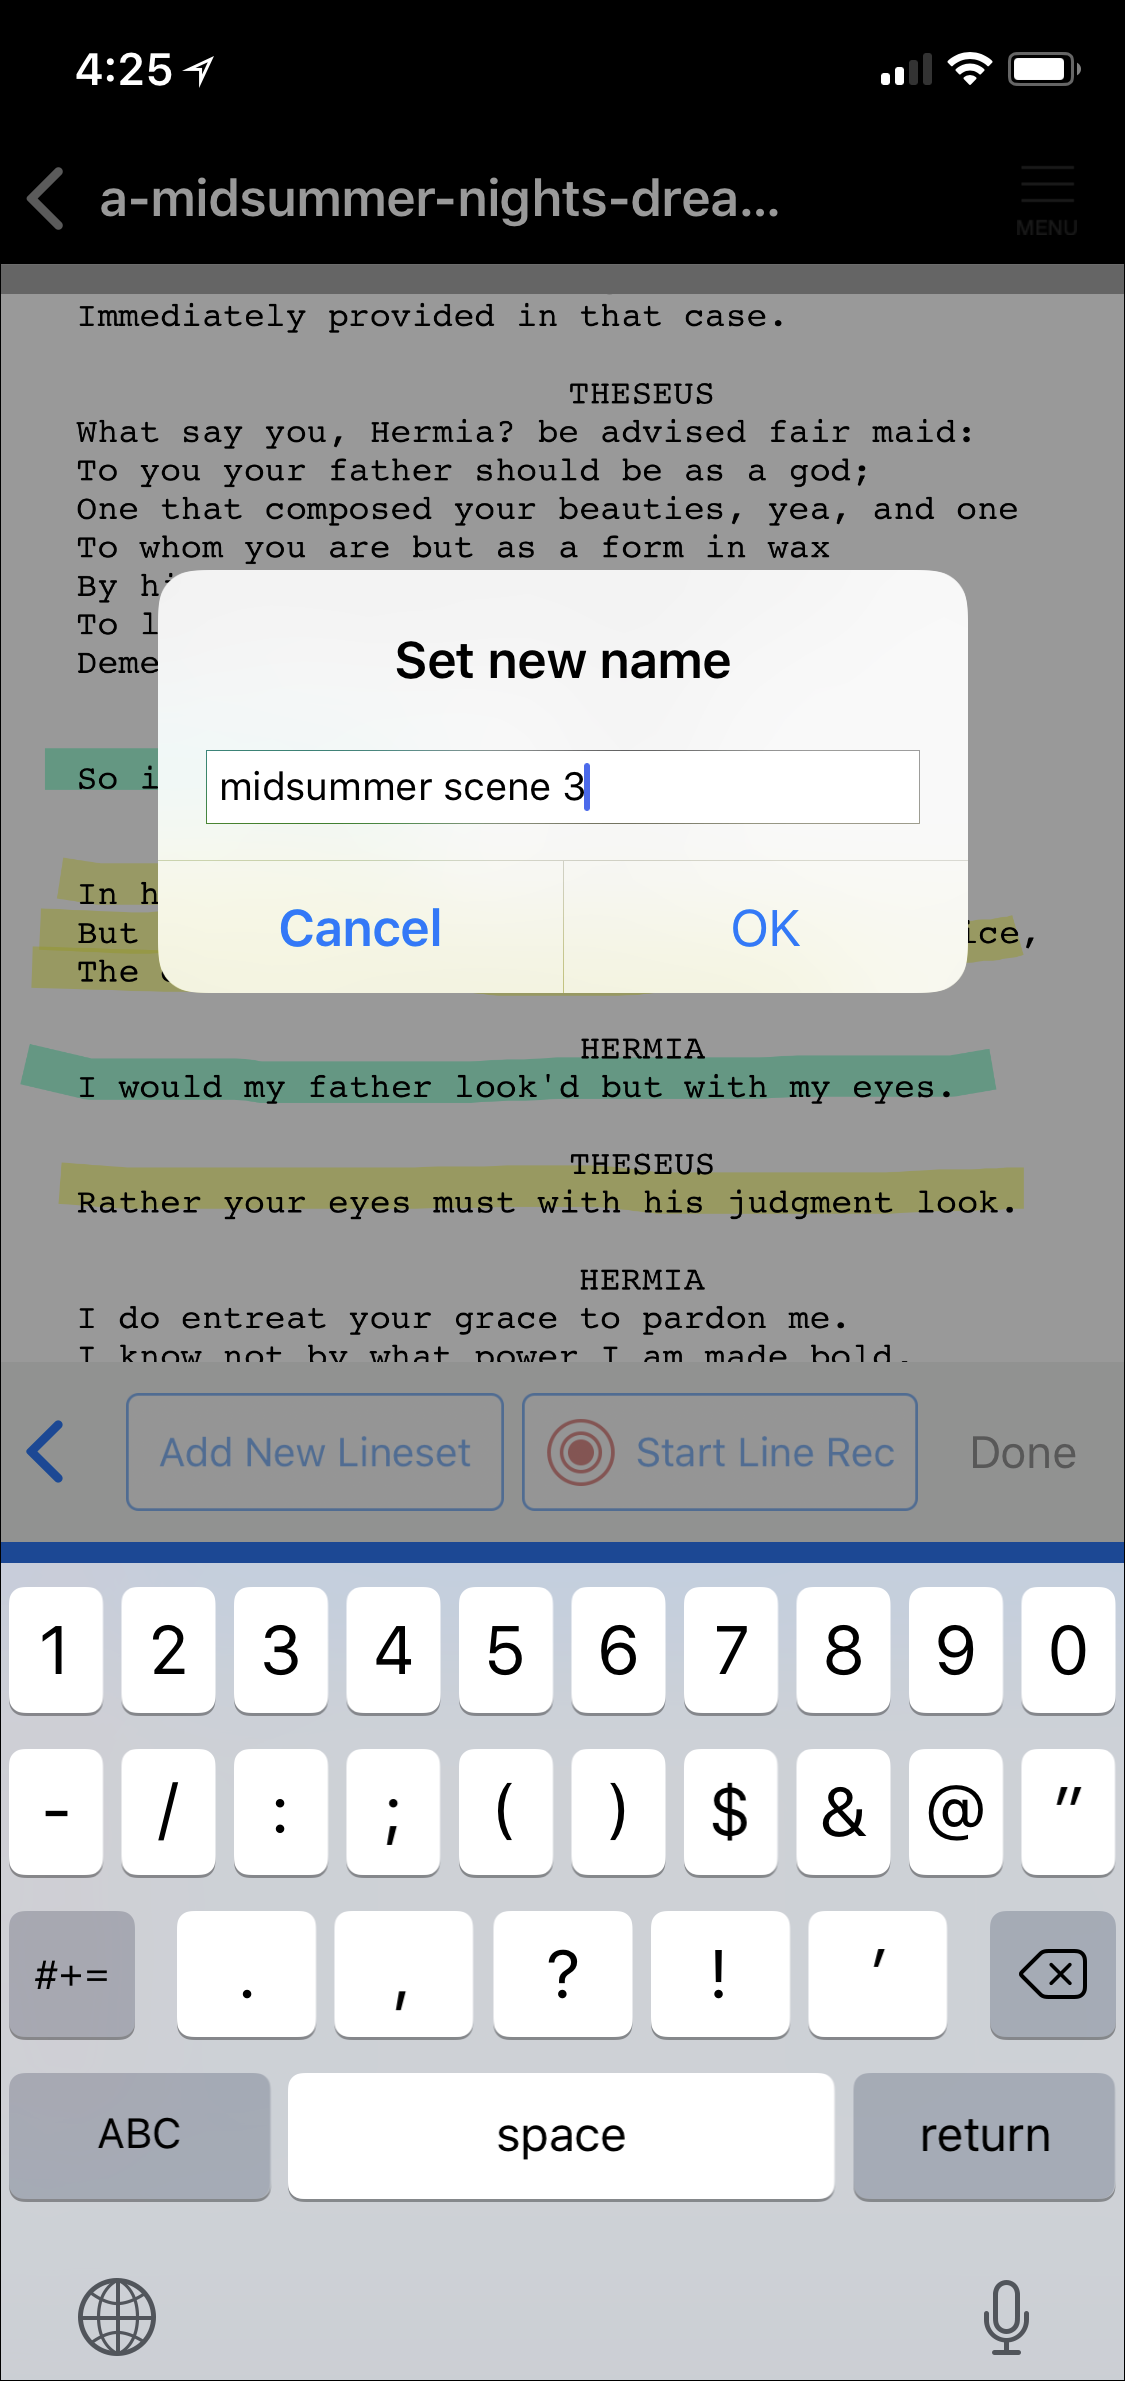
If you want to rename a line or a lineset, tap the Rename button for the item, then enter the new name you want. Tap OK, and your item will be renamed.
If you want to rearrange your lines, enter Edit mode, then tap and hold on the three-line handles to the right of any line you want to move, and drag the line to its new location. You can also rearrange linesets in the lineset list in the same fashion, if you have more than one lineset:
Enabling and disabling lines
Once you’ve rehearsed your lines with this recorded scene, to the point where you know the lines cold, you can disable just your lines and run the scene by only playing back your scene partner’s lines, and voicing your lines without any prompting from the app. Just tap on the speaker icon to the left of any of your lines in the lineset (you don’t need to go into Edit mode for this), and rehearse your scene without them.
Using Linesets when self-recording an audition
You can use the lineset feature to create a virtual “reader” for self-recorded home auditions.
When recording a lineset, change your voice a bit when recording your scene partner’s lines, so that you don’t sound exactly like yourself. You can record your lines as usual. Also, turn your head away from your device when to recording your scene partner’s lines so that your “reader” sounds off mic, but understandable.
Then, disable your lines so that only your scene partner’s lines will play. Have your device near you when you’re recording your audition, on a surface off-camera, and tap the screen when you want the next line “read”. Adjust the volume on the playback appropriately, so that it sounds like you have a reader across the room from you. We’ll go into a bit more detail in the next help screen.